Showing posts with label palm sugar. Show all posts

Thursday, June 17, 2010

Cherry & Brown Butter Streusel Muffins


Whew. Well, that was unexpected. It has been almost 4 weeks since I posted anything, I can hardly believe it. I went out of town fully intending to bake and post while I was there - I even drove half-way across the country with my stand mixer, digital scale and a box of baking essentials. Then about 3 days into the trip, my laptop died. My 1 1/2 year old MacBook Pro. Died. I was not so happy about this. I waiting to find out if it can be fixed, and in the meantime, I'm borrowing my mom's laptop. Thanks, Mom!

I've been back in town about a week, and finally got around to baking last night.


I miraculously found cherries for $1.49 per pound - organic, of course - and decided to make a treat for my little ones to wake up to this morning.


It is no secret around here that I'm slightly obsessed with all things containing brown butter and topped with streusel; I mean, how can you go wrong?! I thought the deep nutty flavor of the brown butter would pair nicely with the juicy, moderately tart cherries. Oh, yes. Oh. Yes.

These muffins arenot excessively moist, so don't overbake them! They are, however, soft and tender and incredibly flavorful. The brown butter really comes through, and melds beautifully with the whole wheat flour and vanilla extract. The streusel adds a wonderful crunch, while the cherries provide little bursts of juiciness every couple bites. Berries of any variety would also work great in this recipe, just be sure not to thaw them if you use frozen ones.


* * * * *


Cherry & Brown Butter Streusel Muffins


For the Streusel
1/2 cup whole wheat flour
pinch of salt
1/2 cup palm sugar
2.5 oz (5 tablespoons) unsalted butter, browned

For the Muffins
1 cup whole wheat flour
1 cup all purpose flour
1/2 cup palm sugar
1 tablespoon baking powder
3 tablespoons arrowroot or cornstarch*
1/4 teaspoon salt
4 ounces (1 stick) unsalted butter, browned
1 cup milk
1 1/2 teaspoons vanilla extract
1 1/2 cups pitted cherries, then halved

Preheat oven to 375. Line 12 regular muffin cups with liners, or butter and flour cups.

In a small bowl, combine all ingredients for streusel, mix well, and place in refrigerator until needed.

In a large bowl stir together flours, palm sugar, baking powder, arrowroot or cornstarch and salt. In the pan you browned your butter in, add milk and vanilla extract. Add butter mixture to dry ingredients, and mix until just combined. Fold in cherry halves. Distribute batter evenly among muffin cups. Crumble streusel on top of batter in cups. Bake for about 20 minutes, or until a tester inserted into center of muffins comes out clean.

*You may have noticed this is an eggless recipe. If you would prefer to use eggs instead of the arrowroot or cornstarch: omit arrowroot/cornstarch from dry mix; reduce milk to 3/4 cup; add two eggs to butter mixture after you've added the milk - it should be cool enough that the eggs won't cook.


Wednesday, May 19, 2010

TWD (rewind): La Palette's Strawberry Tart


The TWD recipe for this week was supposed to be Apple-Apple Bread Pudding (and it was supposed to be posted yesterday - oh, details, details...), but I am just not a fan of bread pudding. Instead of skipping this week entirely, I decided to go back into the archives and bake something the group made before I was a member.


My mind immediately went to this tart. I've thought about it a lot since seeing it for the first time last year. So simple, so perfect. Seeing as I had a tub of local strawberries that needed to be used, I knew this was the perfect choice.


My crust is dark and speckled, because I used palm sugar to sweeten it instead of powdered sugar. I was unsure of how this would affect the outcome, but I wanted my boys to be able to eat it, so I went ahead and tried it out. The crust was fantastic. Crispy, and much more shortbread-like than it is with powdered sugar. Plus, I like the rustic effect the palm sugar lends to it.


The only other elements besides a crust are jam and strawberries. Couldn't be simpler! I used a fruit-only spread for the jam, and tossed my strawberries in a tad of agave, mostly to give them a nice shine - they were so sweet, they didn't need anything!


This tart might be my boys' favorite thing I've ever baked. They couldn't get enough. They ate a third of it in one sitting. Keep in mind they're 1 1/2 and 3 1/2, so that's quite a feat!


It is so perfect in it's simplicity and it is incredibly versatile - you could use any fruit and jam combination you can think up! If you had the tart dough prepared in advance, you could throw this dessert together in no time at all. I'm sure it would be fantastic with some fresh whipped cream on top, but ours didn't last long enough to make any! Dorie also suggests fresh cracked pepper on top. I did try a piece this way, and I was surprised at how much I enjoyed it. The pepper was earthy and slightly biting, imparting a lovely contrast to the sweet berries and jam, and I plan on cracking pepper on all manner of desserts from now on.


La Palette's Strawberry Tart
adapted from Baking from My Home to Yours


Best quality strawberry jam
1 quart ripe strawberries - trimmed and halved if they're large, and tossed in 1-2 teaspoons of light agave; just enough to give them a shine, not so much that they're dripping
1 9-inch tart shell made with Sweet Tart Dough (recipe follows)

Sweet Tart Dough
1 1/2 cups white wheat flour
1/2 cup palm sugar
1/4 teaspoon salt
1 stick + 1 tablespoon very cold (or frozen) unsalted butter cut into small pieces
1 large egg yolk

Put flour, palm sugar and salt in bowl of food processor and pulse a couple times to combine. Add butter pieces to bowl, and pulse until butter is coarsely cut in, with pieces of varying sizes. Stir egg yolk to break it up, and add it to food processor a little at a time, pulsing after each addition. When the whole yolk is in, process in long pulses until the dough begins to clump. Turn dough out onto board, and knead it just enough to incorporate any flour that didn't get mixed in. Press dough into a well-buttered 9-inch tart pan with removable bottom. Freeze for at least 30 minutes - preferably longer - before baking. Preheat oven to 375. Butter the shiny side of a piece of aluminum foil and fit it tightly across the crust, buttered side down. Bake for about 25 minutes, then remove the foil and bake for another 8-10 minutes, or until the crust is evenly browned and firm to the touch. Let crust cool completely.

Finishing the tart
Spread an even layer of jam on the crust, add strawberries. Tart is best when eaten immediately after being assembled.


Tuesday, May 4, 2010

TWD: Burnt Palm Sugar Ice Cream


It has been way too long since I've made ice cream. Every time I make it, I wonder why I don't do it more often, it's really so easy! I was really happy that the TWD bakers were tasked to churn some this week, because it forced me to pull out my ice cream maker for the first time in a very long time.

This is basically a caramel ice cream. First you make a simple caramel out of sugar and water, then add the rest of the ingredients to the pan, resulting in your ice cream base. Couldn't be easier!


This is a delicious, rich, deeply flavored creamy treat. One that even my little ones got to enjoy, since I used palm sugar in place of cane sugar.


Thanks so much to Becky of Project Domestication for this fun pick, the recipe can be found on her blog.

Also, my business is having a great giveaway on our Facebook page, enter here!

Sunday, May 2, 2010

Quinoa Cookies


There has been quite a bit of buzz lately about the new baking book Good to the Grain by Kim Boyce. As soon as I heard about the book I bought a copy, I knew it would be right up my alley. I was right.

Good to the Grain is all about baking with whole grains, and each chapter is devoted to a different one; whole wheat, barley, amaranth, quinoa and more. Though I eat a variety of grains on a regular basis, I have barely dabbled with their flours in baking. I've been wanting to incorporate new flours into my baking for some time, but was unsure of how to begin - they all have different textures and flavors and I only have so much time for experimentation!

When flipping through the book for the first time, one of the recipes that immediately jumped out at me was these cookies. I love quinoa. My boys and I eat in on a nearly daily basis. Did you know that it is a complete protein? One of the many things that makes it a regular in my home.

I had no idea what to expect from these cookies. They use not only quinoa flour, but quinoa flakes, plus a hefty 2 teaspoons of nutmeg. Unusual, to say the least.

They came out of the oven much being more attractive than I had anticipated; a crackled top, slightly crispy edges, soft on the inside, flecked all over with the white quinoa flakes. The quinoa flavor is much more subtle than I had hoped - it was rather overpowered by the nutmeg. If I made these again, I would definitely tone the nutmeg down. If you're not sure about your feelings on quinoa, however, you may want to leave the nutmeg as is. I suspect it helps ease people in to the flavor of quinoa which some find to be an acquired taste.

I really enjoyed these cookies, and was surprised at how effortlessly the quinoa fit in. Though I did hope the flavor would be a little more outstanding, though it was there, and very tasty. I used palm sugar as my sweetener, which was a lovely complement to the quinoa and nutmeg. I found them to be a tad on the salty side - which is not something I ever say, I love salty - so you may want to use 1/2 teaspoon less. It just occurred to me that these would also be fantastic as thumbprints, filled with jam or even a nut butter - I'll have to try them that way with some of my remaining dough.

*** Update *** I tasted a cookie on its second day and the nutmeg had mellowed considerably. If you're going to serve the cookies immediately, I would still recommend using a little less nutmeg, but if you think they'll be around a couple of days you may want to leave it as is.


Quinoa Cookies
adapted from Good to the Grain by Kim Boyce


2 1/2 cups white whole wheat flour
1/2 cup quinoa flour
2 teaspoons kosher salt
1 1/2 teaspoons baking powder
1 teaspoon baking soda
2 teaspoons freshly grated nutmeg
8 ounces cold unsalted butter, cut into small pieces
2 cups palm sugar
2 tablespoons molasses (not blackstrap)
2 eggs
2 teaspoons vanilla extract
1 1/2 cups whole oats
1 cup quinoa flakes + 3/4 cup for rolling

Preheat oven to 350. Line baking sheet with parchment. Combine flours, baking powder, baking soda, salt and nutmeg in a medium bowl, set aside. In the bowl of a stand mixer fitted with the paddle attachment, combine butter and sugar and mix on low until just blended, about 2 minutes. Add the eggs one at a time, mixing for about a minute after each addition. Stir in molasses and vanilla. Add flour mixture and mix on low until flour is barely combined. Add oats and one cup of quinoa flakes mixing until just combined. Don't be concerned if the dough seems crumbly, it will come together when you form it into balls. Place remaining 3/4 cup quinoa flakes in shallow bowl. Form dough into balls about 3 tablespoons in size and roll in flakes to cover them completely. Place balls in baking sheet about 3 inches apart. Bake for about 5-18 minutes, until cookies have spread, cracked and are an even golden brown. Let cool on baking sheet.


Thursday, April 29, 2010

TWD: Chockablock Cookies

I've always been a bit of a procrastinator. If there's something I'm not 100% excited about doing, I'll wait until the absolute last minute to do it. I actually baked and photographed these cookies on Tuesday. I loved the cookies, but wasn't thrilled with the photos so I've been dragging my heels on writing this post... Here goes...

This week's TWD treat is a delightful cookie with endless possiblilities for playing around! It is an oatmeal cookie with your choice of dried fruit and nuts, plus coconut and chocolate - though in the interest of feeding them to my children, I left the chocolate out. There's a first time for everything...

I used a combination of dates and pecans, which I just love together. Since I omitted the chocolate, I added a little extra of all of the other add-ins. Not surprisingly, I sweetened my cookies with palm sugar and an unbelievable local molasses. I also used all butter instead of part butter, part shortening.

These cookies are thick, soft, chewy, chock full of goodies and almost healthy enough to call breakfast! One of my favorite things about them is that the molasses is a very prominent flavor. It was a welcome surprise! I think using palm sugar as my second sweetener helped to highlight the molasses, as it is itself rather dark in flavor.

Thanks to Mary of Popsicles and Sandy Feet for choosing this wonderful cookie for us to bake! The recipe is on her blog.


Monday, April 5, 2010

Baklava


My love for baklava goes as far back as I can remember. I mean, what's not to love about a sweet, syrup-soaked nutty treat?! I have been known to dine at Middle Eastern restaurants for the sole purpose of partaking of their dessert offerings...


Though I am not a part of any organized religion, I really look forward to holidays. Since I don't have associations with the various holidays that many religious people do have, it can be hard to cut through all of the mass-produced, commercialized junk that is out there to find personal meaning in them. For me, though, holidays are about family being together, and tradition. The traditions don't have to be huge and deeply meaningful, but I believe it creates a sense of comfort and stability for kids when there are certain things they can always depend on. Even if it is as small as the food that is served. It always comes back to the food, doesn't it?


I made this baklava for Easter brunch with my family. It is something that I've been wanting to make for a long time - the last time I made it was almost ten years ago when I was in college - so I jumped at the chance! It was a huge hit, and is certain to become part of Easter tradition for me and my boys.


I looked at several baklava recipes, took bits and pieces from each one, added my own touches and came up with this beautiful and delicious version. It was a good thing I had several family members over to my house, because this recipe makes a ton of baklava, and I would have eaten it all by myself if I hadn't sent some home with everyone...


Here are a few tips before you start making your baklava:
- Make sure your phyllo dough is completely defrosted before using it. At least 24 hours in the refrigerator or 6 hours on the counter should do the trick.
- While you're working with the phyllo, lay the whole stack out flat and cover it with a barely damp kitchen towel. This will keep the thin layers of dough from drying out as you work with one piece at a time.
- Phyllo dough comes in different sized pieces. The ones I used were twice the size of the pan I made my baklava in. In order to use the entire sheet of phyllo, line two corners up in the corners of the pan, draping the rest of the piece over the side of the pan. Brush with melted ghee - see below - then fold the overhanging dough over the half in the pan. This fit perfectly in my 17"x10 1/4" pan. Even with folding, you may have to do some trimming with a sharp knife if the pan you use is smaller.
- You'll need ghee for this baklava. It is delicious and easy to make. Here's how: http://blueridgebaker.blogspot.com/2010/01/ghee.html


Baklava


1 pound phyllo dough
18 ounces pecans (or walnuts, or pecans, or a combination of nuts)
7 ounces ghee, melted*
2 tablespoons palm sugar
4 teaspoons ground cardamom
1 teaspoon cinnamon
1/2 teaspoon salt
pistachios for garnish

Soaking Syrup
1 cup honey
1/4 cup water
1 tablespoon rose water

*you want to keep the ghee liquid at all times, so if it begins to cool and thicken, just pop it back on the burner for a minute.


Preheat oven to 275. Put pecans, palm sugar, cardamom, cinnamon and salt in food processor. Pulse several times until it becomes the texture of coarse meal. Brush pan with ghee. Lay a piece of phyllo in pan, brush evenly with ghee. Repeat until there are 8 layers of phyllo. Pour half of the nut mixture in pan. Spread it evenly. Continue layering phyllo, this time, 4 layers. Top with remaining nuts, then another 12 layers of phyllo. Remember, every time you layer the phyllo, you brush each piece with ghee before adding the next. Brush the 12th layer with ghee, and cut into desired shapes using a sharp knife. Bake for about 2 hours, or until the top is slightly browned. While baklava is baking, make the syrup:

In a glass measuring cup, combine honey, water and rose water. Stir until smooth. As soon as baklava comes out of oven, pour syrup evenly over the entire thing. Let cool to room temperature before eating - this will ensure even absorption of syrup, and the baklava will be less likely to have a soggy bottom.


Wednesday, March 31, 2010

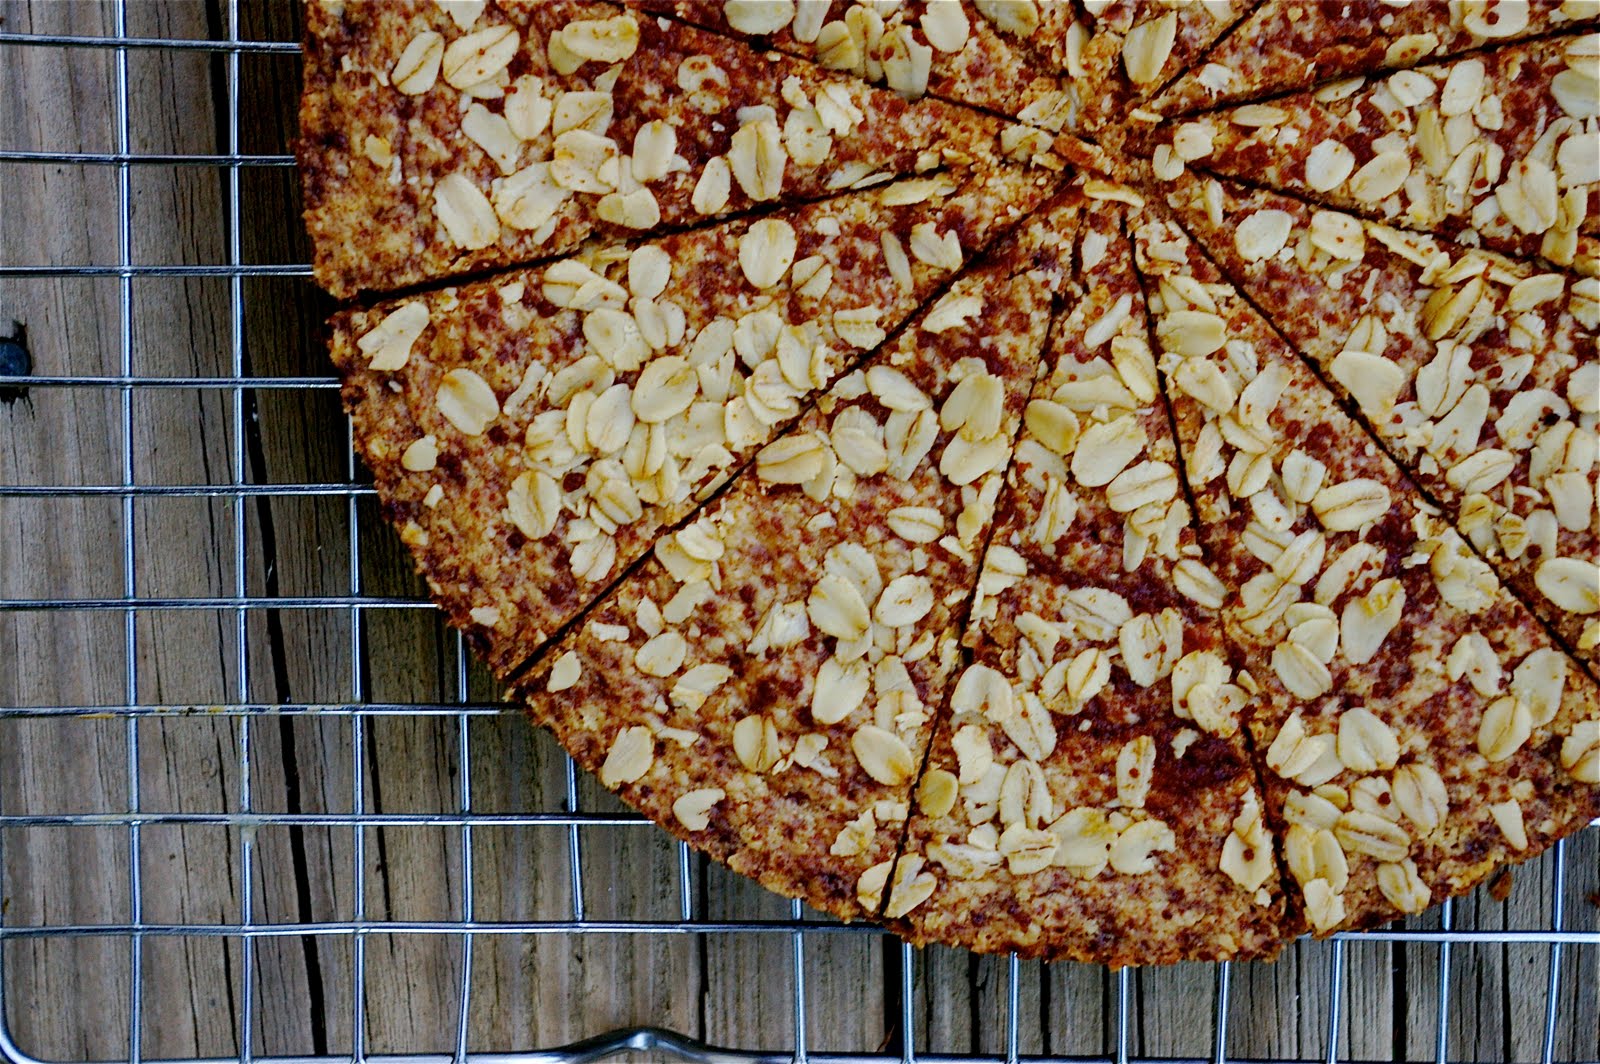
Oatmeal Shortbread


When I was a junior in college, I spent a semester abroad in London. I have many incredible memories from that time, among them, the digestive biscuits that I consumed with great gusto. There were many varieties I enjoyed, but one of my favorites was a thin, unassuming oaty biscuit that was somewhere between a cookie and a cracker - might they be called Hob Nobs? - that was barely sweet, and had a wonderful nubby, crumbly texture. With the first bite I took of this shortbread, I immediately thought of those lovely cookies.

This is unlike any other shortbread I've ever had. Usually characterized by its buttery melt-in-your-mouth texture, this version is less refined and a little more homey in its appearance, but it loses nothing in flavor. It is actually very similar to the Sbrisolona I made a few months ago in many respects despite the fact that it contains no nuts - the signature of Sbrisolona. The oats add a fantastic flakiness to the shortbread, making it at the same time light, soft, crispy and crumbly.

I love the fact that there is so little sugar in this recipe, as I'm quite fond of desserts that are subtly sweet. My little ones haven't tasted it yet, but I feel sure they'll approve.


Oatmeal Shortbread
adapted from Pastry Studio


1 cup white wheat flour
1/2 cup whole rolled oats + some for dusting
1/3 cup palm sugar + some for dusting
1/2 teaspoon salt
12 tablespoons cold unsalted butter, cut into several chunks
1 teaspoon vanilla extract

Preheat oven to 325. Butter an 8" spring-form cake pan or tart pan. In the bowl of a food processor, combine flour, oats, palm sugar and salt. Pulse a few times to combine. Add butter and vanilla and process until dough forms a ball. Press dough evenly in prepared pan, and sprinkle with a light layer of oats and palm sugar. Bake for about an hour, or until shortbread has taken on a deep golden color. Let cool on rack for 10 minutes, then remove sides of pan, and cut shortbread with a sharp knife while still warm.


Thursday, March 25, 2010

St. Louis Gooey Butter Cake


I grew up in a small town in southeast Iowa, a mere 5 hour drive from St. Louis, a city I visited several times over the years. Why then, had I never heard of a St. Louis Gooey Butter Cake until recently?


The first time I saw this cake was a few months ago - soon after it was published in the New York Times. It was the name that got me; how could anything with the words "gooey" and "butter" in it be a bad thing. So descriptive, so evocative, yet so mysterious... What in the world was this gooey butter cake?! I had to find out. After reading more about it I knew I had to make it. However things came up, as things tend to do, and I forgot about it. Until Deb made it recently. Seeing hers made me fairly obsessed, and I knew I wouldn't be able to get it out of my mind until I was taking it out of my oven. Yesterday was the day. The day I finally got around to baking this oh-so-ugly, yet oh-so-tasty cake.


This cake starts with a layer of lightly sweetened brioche-like yeasted dough, and is topped with something gooey, buttery, rich, butterscotch-flavored, delicious. When put together, they create a treat very reminiscent of a cinnamon roll - though there is actually no cinnamon in the recipe... The cake itself is tasty, though not spectacular - it is far out-shined by the gooey topping, which is out of this world. It would be amazing on a shortbread crust. The yeast cake is a little on the dry side, but I think if the quantity of the gooey topping was doubled it would off-set the dryness. It should be noted that my cake is darker than the other gooey butter cakes out there, as I sweetened it with palm sugar.


St. Louis Gooey Butter Cake
adapted from The New York Times


Cake Layer:
3-5 tablespoons milk
2 tablespoons water
1 3/4 tablespoons instant yeast
6 tablespoons unsalted butter, softened
3 tablespoons palm sugar
1 teaspoon salt
1 large egg
1 3/4 cups unbleached white flour


Gooey Topping:
3 tablespoons + 1 teaspoon agave (I used amber)
2 tablespoons water
2 1/2 teaspoons vanilla extract
12 tablespoons unsalted butter, softened
1 1/2 cups palm sugar
1/2 teaspoon salt
1 large egg
1 cup + 3 tablespoons unbleached white flour


Make the Cake:
Butter a 9x13 baking pan, set aside. Combine water and 3 tablespoons of milk in a small saucepan, and heat until it reaches about 90 degrees. Pour into a small bowl, and add yeast. Whisk to combine. In the bowl of a stand mixer fitted with the paddle attachment, cream butter, palm sugar and salt. Beat in egg. Add 1/3 of the flour, then half of the yeast/milk mixture, stirring to combine with each addition. Repeat for a total of 3 flour additions and 2 milk additions. Beat dough on medium speed until it is smooth and pulls away from sides of bowl, about 7-10 minutes. At this point, if the dough seems too dry, add the additional milk. The dough should be a bit loose and slightly sticky to the touch. Press dough evenly into your prepared baking pan. Cover with kitchen towel and set in a warm place until dough has doubled. About 2 1/2 - 3 hours. Towards the end of the rise, preheat oven to 350.

Make Gooey Topping:
In a small bowl, combine agave, water and vanilla. Set aside. In bowl of stand mixer fitted with paddle attachment, beat butter, sugar, and salt until light and fluffy. Add egg, and beat until combined. Add flour in three additions alternating with agave mixture in two additions. Stir until just combined. Spoon topping over risen dough, and spread as gently and evenly as possible. Bake for 40-45 minutes. Cake will not be flat when baked - it will have hills and valleys all over the surface. It will not be attractive. Top will be deep golden, and center will still be liquid when done. Cool in pan before cutting. Sprinkle with confectioner's sugar, if desired.


Thursday, March 11, 2010

Lemon Upside Down Cake


Upside down cakes have got to be one of the greatest categories of baked goods. I mean, what is not to like about a cake that has a caramel-like crust, tender fruit and a moist base, made, baked and served in less than an hour.

It is strange to me, but until recently I never thought there were possibilities beyond a pineapple upside down cake. What a world of deliciousness I have been missing!!! I mean, I do love a good pineapple upside downer, but there are so many other cakes to be eaten! I love this apple upside down cake more than words can say, and I think pear would be equally delicious. I recently saw a banana version somewhere - which I'm dying to try - and this lemon cake is just heavenly. Heavenly!


I made this a few days ago for my boys, and it is perhaps their favorite thing I've ever baked. They didn't like the lemons on top - granted, they are rather tart - and took them off, but I love those lemons. With baking they become tender, chewy, and soaked with (palm) sugar and butter, turning them into a sort of heightened candied lemon peel that I would gladly eat sans cake.


The cake itself, however, is fantastic and not to be skipped over. Incredibly moist, fluffy crumb, lemony. I wasn't sure about the flavors of palm sugar and lemon together, but I wanted my kids to have a treat so I went ahead with it. I'm so glad I did, because the deep, rich palm sugar pairs beautifully with the tangy, light, zippy lemon. If you've never had palm sugar, it's worth seeking out (despite its hefty price tag), because it really adds an extra dimension to baking, plus it has a glycemic index of only 35. I have an exciting palm-sugar related announcement that I'll be telling you about soon. I would like to figure out how to make a cake that had a larger portion of the crunchy sugary edges that upside down cakes naturally have - perhaps an upside down cake minus any fruit? Hmm, I may have to try this out... Or a smaller pan... Or both! I'll let you know how it turns out.


Lemon Upside Down Cake
adapted from Luscious Lemon Desserts by Lori Longbotham

2 medium lemons
3/4 cup unsalted butter, softened, divided
1 1/4 cup palm sugar, divided
1 1/2 cups unbleached white flour
2 teaspoons baking powder
1/4 teaspoon salt
3 tablespoons finely grated lemon zest
2 large eggs
1/2 teaspoon vanilla extract
1/2 cup whole milk

Preheat oven to 350. Wash lemons, cut ends off, and slice as thinly as possible - 1/8" thick or less. Discard seeds. In a 10" cast iron (or other) skillet, melt 1/4 cup of butter with 1/4 cup palm sugar, stirring until palm sugar is dissolved. When mixture begins to boil, arrange lemon slices in an attractive pattern (though it may be disrupted by the batter) and continue to boil for one minute once the lemons are all in place. You don't need to worry about using all of the slices you cut, but the entire bottom of the pan should be covered - it is okay if they overlap. After one minute, remove skillet from heat and set aside while you prepare the batter. Combine flour, baking powder and salt in a medium-sized bowl and set aside. In the bowl of a stand mixer fitted with the paddle attachment, beat the remaining 1/2 cup butter on medium speed until light and fluffy. Add the rest of the palm sugar (1 cup) and lemon zest and beat until fluffy. Add eggs one at a time, beating until well combined. Stir in vanilla. With mixer on low, add 1/3 of the flour mixture, followed by 1/2 of the milk, stirring each time until just combined. Repeat with remaining flour and milk. Spoon batter over lemons in skillet, and smooth as evenly as you can. Bake for about 30 minutes, or until top of cake is golden and a tester inserted in the center comes out clean. Let cool for 10 minutes in skillet, then invert onto a heat-proof plate/cake stand. If you let the cake cool completely, it is much easier to cut through the lemon slices using a very thin serrated knife. It is delicious warm, however, so serve it as you will.


Wednesday, March 3, 2010

Almond Butter Thumbprints


I'm always trying to create new treats that I think my boys will enjoy. Sometimes I fail miserably, but sometimes I hit upon a winner. These cookies are a serious winner.

Though I had the idea about a year ago, it took me until last month to make a peanut butter cookie with almond butter. I've now made them three times in two weeks, and my little ones can't get enough. These are some of the easiest and simplest cookies I've ever made, and their taste far outshines their appearance.


These humble little cookies may not be pretty, but they are fantastic. They are full of almond flavor, which pairs beautifully with palm sugar; the chunky almond butter gives the cookies a wonderful nubby texture, and the cookies are satisfyingly dense. The dab of jam lightens them up and provides a lovely counterpoint to the richness from the nut butter. I can't get enough of them either!

Don't be alarmed if the dough seems greasy, they won't bake up that way.


Almond Butter Thumbprints

1 cup almond butter
1/4 cup (1/2 stick, 4 tablespoons, 2 ounces) unsalted butter, softened
3/4 cup palm sugar
1 egg
1 teaspoon vanilla extract
3/4 cup unbleached white flour
1/4 teaspoon baking soda
1/2 teaspoon salt
jam

Preheat oven to 350. Line a baking sheet with parchment, set aside. In the bowl of a stand mixer fitted with the paddle attachment, beat the almond butter, butter and palm sugar until fluffy. Add egg, and beat until combined. Stir in vanilla. Add flour, baking soda and salt, and mix until just combined. Form dough into balls about 1 inch in diameter, or 1 ounce each. Flatten ball into disk, and form a small well in the center with a fingertip. Place disks 1 1/2 inches apart on prepared baking sheet. Spoon a dollop of jam - I use sugar-free fruit spread, use what you like - into each well you've created. About 1/2 teaspoon should do. Bake cookies for 12-14 minutes, or until very lightly browned. Cool completely on baking sheet.


Friday, February 5, 2010

Pistachio + Date Scones


I've been chasing simplicity for quite some time, but can never seem to achieve it. In my mind, all I want is a quiet life in the town I grew up in; baking and being with my kids, friends, family. There is something very comforting about a place where you know everyone you see, and they have all known you since toddlerhood. In reality, I am nowhere near that (and may never be). The last few years have been very stressful for me. In no particular order; I've had two kids, gotten married, sold a house, built a house, moved 5 times, and opened a retail store. It hasn't all been easy - and it certainly hasn't been simple - but it's life. My life. Now another chapter is beginning in my life; that of being a single mom. It will certainly be an adjustment, but everyone will be a lot happier. Now that's all I'm gonna say about that.


Scones are simplicity itself - even when as gussied up as these are. So, even if I can't live my bucolic dreams, I can eat them.


These scones are eggless, and made with cream. I love breakfast treats made with cream - it gives them such a soft, light crumb that almost melts in your mouth. Pistachios have a very distinct flavor - buttery, smoky, savory - and are not commonly found in scones, so these are an unexpected and delightful addition. They are also a wonderful foil for the sweet dates. I love dates. I love them plain, I love them rolled in coconut, I love them in baked goods. I've never met a date I didn't like. When baked, they become unbelievably tender - date paste, almost - and if you're lucky enough to get one that is slightly exposed in the dough you're in for a real treat. The edges become slightly crispy and chewy and caramelized, and they are delicious.

These are sure to be a regular treat around these parts. Next time, however, I will add more dates - I think 1 1/2 cups instead of 1 cup. I thought the date to pistachio balance was a little off. Also, they took a bit longer to bake than the recipe specified. I had to turn the oven down and cover them with foil to prevent them from burning. I would recommend baking them at 400 instead of 425, as the original recipe calls for. I'm writing the recipe below as I made them, with changes I would make in parentheses.


Pistachio + Date Scones
adapted from eatmakeread


2 cups unbleached white flour
1 tablespoon baking powder
3 tablespoons palm sugar (or any other sugar; if you use unsalted pistachios, you could reduce this by 1 tablespoon)
1/2 teaspoon salt
5 tablespoons cold unsalted butter, cut into small cubes
1 cup dates, chopped (I think they need 1 1/2 cups)
1/2 cup + 2 tablespoons pistachios, chopped, divided
1 cup + 2 tablespoons heavy cream, divided


Preheat oven to 425 (I think this should be more like 400). Line baking sheet with parchment. In a large bowl, combine flour, baking powder, sugar and salt. Add butter, and using a pastry blender cut it in until well-combined, but so that there are still some large-ish pieces of butter in the mixture. Add dates and 1/2 cup pistachios, tossing with your hands, and separating any large clumps of dates. Add 1 cup heavy cream, and stir with fork until a dough forms. Turn out onto a floured board, and pat into a disk about 1/2" thick. Cut into 8 wedges. Place wedges on baking sheet, giving them as much space as you can. Spoon a bit of the remaining cream on the top of each scone, spreading it with the back of the spoon to coat the surface of the scone. Sprinkle tops of scones with remaining chopped pistachios. Bake for about 15 minutes, or until scones are golden. If they seem to be browning too quickly, cover them loosely with a piece of aluminum foil. Let cool on rack for at least 10 minutes.

Monday, February 1, 2010

Coconut Bread


I've always been impulsive.

This impulsiveness surfaces in every aspect of my life, from the most trivial - such as the constant changing of my hair - to the potentially dangerous...

An example: when I was 23 and I took off on a cross-country road trip by myself. It seemed harmless enough. I was supposed to be gone for 2 weeks, but close to the end of my trip I blew a tire on the interstate. I was just outside Claremore, OK, whose only claim to fame is being the birthplace to Will Rogers. The speed limit was 75, so I was going about 80. I was listening to Tori Amos' Tales of a Librarian, when all of a sudden my car started to fishtail. Before I knew it I was air-bound, flying off the side of the road. My car landed - blowing another tire - spun around several times and came to rest in some tall grasses. Miraculously, I wasn't injured. Not even a bruise. My car was another story. It required almost $8000 in repairs, and while it was being fixed I was stranded in Tulsa. For two weeks. By myself. I spent the whole time in my motel room watching Law & Order re-runs and knitting.


Though hopefully no experience as extreme as my stay in Tulsa will result from any decision I make in the kitchen, my impulsiveness shows itself in my baking, too - this is on the trivial end of the impulsive spectrum. Sometimes I have a desire to bake, but I have a hard time deciding exactly what I want to bake. If I happen upon a recipe that inspires me, however, I have to make it immediately. Whether it is late at night, early in the morning, in the last 30 minutes I have before I go to work, etc... This was one of those recipes.


As soon as I saw this on Seven Spoons, I started measuring ingredients. It was a perfect recipe to happen upon, as I had been wanting to make my boys a new quick bread for breakfast. Plus, I had just made this fantastic coconut cake that they weren't able to eat, which I felt a little bad about because it was so delicious. Making this bread was my way of giving them a little taste of what they had missed.

This coconut bread is like the less-refined cousin of that cake. Denser, heavier than the cake, with none of its fluffy delicacy though all of its coconut-y goodness. This has more heft, more texture from a greater amount of shredded coconut, which also gives it a little chew. It has a moist, soft crumb and a substantial crust. It is humble, yet sublime.

Taking a cue from the cake, I used coconut milk in place of whole milk to enhance the coconut flavor. I also used palm sugar to sweeten it - which comes from the coconut palm; coconut everywhere! This is a fantastic quick bread eaten plain or toasted with butter and equally as appropriate eaten for breakfast or with your afternoon tea. If you wanted to dress it up a little and serve it as dessert, I'm sure it would also be delicious with chocolate chunks - though for me it would slightly defeat the purpose, as then my kids wouldn't be able to eat it.

Thankfully, not all roads of impulsiveness lead to Tulsa.

Coconut Bread
adapted from Bill Granger via Seven Spoons

2 large eggs
1 1/4 cups coconut milk
seeds scraped from 1/2 a vanilla bean, or 1 1/2 teaspoons vanilla paste or 1 1/2 teaspoons vanilla extract
2 1/2 cups unbleached white flour
2 teaspoons baking powder
1/2 teaspoon salt
1 cup palm sugar
5 ounces (about 1 1/2 cups) unsweetened shredded coconut
6 tablespoons unsalted butter, melted and cooled slightly

Preheat oven to 350. Butter and flour an 8 1/2" x 4 1/2" loaf pan. Whisk together eggs, coconut milk and vanilla in a small bowl, set aside. Sift flour, baking powder and salt into a large bowl, then stir in the palm sugar and shredded coconut. Make a well in the dry ingredients, and pour in egg mixture, stirring until just combined. Fold in melted butter, mixing only until incorporated. Do not over-mix. Pour into prepared pan. Bake for about an hour, or until a tester inserted in the center of the loaf comes out clean. Cool in pan for 30 minutes, then un-mold and cool completely on rack before cutting.


Related Posts with Thumbnails

ShareThis