Showing posts with label cookies. Show all posts

Saturday, May 22, 2010

Rhubarb Curd Shortbread Bars


Curd. What an unappealing, clunky name for something so silky and delicate and delicious. Most of the curd around is of the lemon variety. I've been meaning to make it for some time, and just had trouble finding the initiative to actually do it. Not so with rhubarb curd. It never occurred to me that such a thing could exist, and as soon as I knew it did, I couldn't wait to make it.

Actually, there are about 37,052 rhubarb recipes that I want to try this Spring. I can't believe how versatile this strange stalk is - take a look at this! - and I can't wait to further explore it's many facets.


These bars are heavily adapted from a recipe I saw on Food52 - the curd is completely different, and the flavor of the shortbread is simplified. And they almost didn't happen. I ran into just about every problem possible when making these - I won't bore you with all of the details, suffice it to say I was shocked that they turned out so well. But, oh, how well they did come out... They are wonderful. Light and refreshing, creamy, sweet - but not too sweet. The rhubarb flavor is subtle, and almost delayed in its arrival. With nearly every bite I took, it gently snuck up on me.


This dessert is so unabashedly feminine, it almost seemed wrong to be eating it from the pan with a spoon. Ahem. To really do these bars justice, they should be served on dainty plates with a cup of tea.

The shortbread base is heavily flavored with ginger, and is a lovely complement to the curd. It was, however, incredibly crumbly - as you can see in the photo below; very frustrating. While crumbly is typically a good thing in regards to shortbread, here it made the bars very difficult to remove from the pan. I should have followed my instincts and lined the pan with parchment. Let that be a lesson!

These bars are fantastic, even when eaten with a spoon, and my mind is now reeling with all kinds of new curd possibilities!


Rhubarb Curd Shortbread Bars


For the Shortbread
12 tablespoons unsalted butter
1/4 cup powdered sugar
1/2 teaspoon salt
1 1/2 cups unbleached white flour
2 teaspoons ground ginger


Line an 8x8 baking pan with parchment, butter parchment, set aside. Combine all ingredients in the bowl of a stand mixer fitted with the paddle attachment. Mix until just combined. Press into pan (mine was actually rather fluid as my butter was incredibly soft, so in this case, pour into pan), smooth the top and place in freezer for 30 minutes. In the meantime, preheat oven to 350. After 30 minutes, bake shortbread for about 30 minutes, or until evenly golden brown. Cool crust completely. In the meantime, make the curd.


For the Curd
1 cup rhubarb juice (from about 1 pound of rhubarb)*
3/4 cup sugar
6 large eggs
2 tablespoons lemon juice**
1 1/2 sticks unsalted butter, cut into chunks
heaping 1/4 teaspoon salt
zest from 1 large lemon

Whisk together rhubarb juice, sugar, eggs, lemon juice and salt in a large heavy-bottomed pan until well-combined. Add butter and cook over medium-low heat, stirring without stopping until curd is thick enough that it holds the marks from the whisk. Pour curd into a bowl and stir in zest.

When crust is cool, top with curd and smooth surface. The curd layer should be about the same thickness as the shortbread layer, so if you seem to have a lot of curd, don't feel you have to use it all. Bake for another 20 minutes. Place in fridge for 30 minutes to set curd. Let cool completely before slicing.

*If you don't have a juicer, you can follow these instructions.

** Don't leave out the lemon juice! For some reason, I wasn't going to include it. My rhubarb juice was the most gorgeous shade of dark pink until I added the eggs. Then it turned purple. Then green. It wasn't pretty. I actually turned off the burner and almost gave up. Then I realized that the lemon juice was there to preserve the color as much as to provide additional tang. I had a tad more rhubarb juice, so I added lemon juice to it, and added that to my pan. Thankfully, the color transformed! It wasn't as deep a pink as I would have liked, but at least it was pink! If lemon juice was added from the get go, it would have been a different story. One of the many road-blocks I encountered...

Sunday, May 16, 2010

Whole Wheat Chocolate Chip Cookies


Not be be repetitive or anything, but I have another one for you from Good to the Grain. I can't help it, I love this book. This was actually the first recipe that I marked to make when I received the book - I mean, they're chocolate chip cookies! Plus, they are the first recipe in the book - but I went with slightly more unusual recipes when I started to bake from it. Then I found myself with a little unexpected time on my hands...

I have a 3 1/2 year old and a 1 1/2 year old, so needless to say, I've suffered my fair share of sleep deprivation. It isn't a terribly common occurrence, but every few weeks my younger son decides that sleep just isn't for him and around 2 in the morning he wants to get up and play for a couple of hours. Well, Friday night was one of those nights. After trying all of my tricks to get him back to sleep, I gave up and decided to bake. This recipe immediately came to mind - I had all of the ingredients and it was simple enough that I didn't think I'd be able to screw it up in my half-asleep state. Thankfully, I was right.

I'm a rather harsh critic when it comes to chocolate chip cookies, so I wasn't sure what to expect from these; they use 100% whole wheat flour, which is fairly unusual for most baked goods.

I served these at a class I gave at my store on Saturday afternoon on cloth diapering and baby wearing, and people were crazy for them. Everyone asked for the recipe, and one woman told me they were the best cookies she had ever eaten! They were a hit!

The first thing that surprised me about these cookies, was the fragrance of the dough; it smelled almost like it contained brown butter and had a stronger aroma than any dough I've ever made. They baked up beautifully, and I couldn't wait to take my first bite. Verdict? They are delicious.

The cookies are soft and chewy, generously studded with bittersweet chocolate chunks, and the whole wheat flour adds a sweet, earthy, nutty flavor that is amazingly complementary to the chocolate. I have to say, these chocolate chip cookies are second only to the ones I made a couple months ago that are a hybrid between the Cooks Illustrated and New York Times versions. That is high praise coming from me.


Whole Wheat Chocolate Chip Cookies
adapted from Good to the Grain


3 cups whole wheat flour
1 1/2 teaspoons baking powder
1 teaspoon baking soda
1 1/2 teaspoons salt
8 ounces (2 sticks) cold unsalted butter cut into several pieces
1 cup palm sugar (or dark brown sugar)
1 cup granulated sugar
2 eggs
2 teaspoons vanilla extract
8 ounces bittersweet chocolate cut into 1/4" - 1/2" pieces


Preheat oven to 350. Line baking sheet with parchment. Combine flour, baking powder, baking soda and salt in a medium sized bowl, set aside. In the bowl of a stand mixer fitted with the paddle attachment, beat sugars and butter on low speed until just blended, about 2 minutes. Add the eggs one at a time, mixing until just combined after each addition. Stir in vanilla. Add dry ingredients, and mix on low speed until flour is barely combined. Stir in chocolate chunks. Form dough into balls about 1.5 ounces each, place on baking sheet 2 inches apart. Bake for 16-20 minutes, until the cookies have spread and cracked, the tops are dry and have browned a bit. Cool on baking sheet.

Wednesday, May 5, 2010

Cashew Chocolate Chip Crisps


I was lucky enough to receive Claudia Fleming's The Last Course for Christmas. It is an incredibly beautiful book that is only available now through the North Fork Table & Inn website. It is pricey, but worth it. I've spent hours perusing the inventive recipes and sumptuous photographs. Everything looks amazing, each recipe meticulous, unexpected, familiar, inviting. I want to make it all.


To christen my book, I started with these cookies. It is well-documented that I love chocolate chip cookies. These are one of the most interesting chocolate chip cookie recipes I've come across, and I just had to give them a try.


They're called crisps, and Claudia describes them as being brittle, but mine weren't... I made my cookies larger than she specifies - heaping tablespoon of dough instead of a heaping teaspoon - which probably accounts for the difference. The texture was fairly standard as far as chocolate chip cookies go, though thinner than I usually prefer. That being said, I loved these cookies. To me they are a cross between a Florentine and a chocolate chip cookie - this is how they are forgiven for being on the thin side; since they aren't a traditional ccc, they don't undergo the typical ccc scrutiny. Though they don't fall short on any other fronts.

These cookies are chewy, crispy on the outside, contain milk and bittersweet chocolate, they're studded with toasted cashews and are finished with orange zest. They are magnificent.


Cashew Chocolate Chip Crisps
adapted from The Last Course by Claudia Fleming


2 1/2 cups toasted cashews
2 1/2 cups white wheat flour
1 teaspoon salt
1 cup unsalted butter, softened
1 1/4 cups palm sugar
1 1/4 cups granulated sugar
1 teaspoon vanilla extract
zest from 1 orange, finely grated
2 large eggs
1 3/4 teaspoons baking soda
1 teaspoon water
8 ounces bittersweet chocolate chunks
8 ounces milk chocolate chunks

Preheat oven to 325. Line a baking sheet with parchment. In a food processor, grind 1/2 cup of toasted cashews and 1 tablespoon flour to a fine meal. In a medium sized bowl, combine remaining flour, salt and the ground cashew/flour mixture. Coarsely chop the rest of the nuts. In the bowl of a stand mixer fitted with the paddle attachment, beat butter and sugars until creamy. Add vanilla and zest, beat until well combined. Add eggs one at a time, beating for a minute after each addition. In a small bowl, dissolve baking soda in water and add it to bowl of the stand mixer. Beat until combined. Add flour mixture in two batches, mixing until just combined. Stir in chopped chocolate and cashews. Drop heaping tablespoons of dough onto baking sheet. Bake for about 18 minutes, until golden brown all over. Cool on baking sheet.


Sunday, May 2, 2010

Quinoa Cookies


There has been quite a bit of buzz lately about the new baking book Good to the Grain by Kim Boyce. As soon as I heard about the book I bought a copy, I knew it would be right up my alley. I was right.

Good to the Grain is all about baking with whole grains, and each chapter is devoted to a different one; whole wheat, barley, amaranth, quinoa and more. Though I eat a variety of grains on a regular basis, I have barely dabbled with their flours in baking. I've been wanting to incorporate new flours into my baking for some time, but was unsure of how to begin - they all have different textures and flavors and I only have so much time for experimentation!

When flipping through the book for the first time, one of the recipes that immediately jumped out at me was these cookies. I love quinoa. My boys and I eat in on a nearly daily basis. Did you know that it is a complete protein? One of the many things that makes it a regular in my home.

I had no idea what to expect from these cookies. They use not only quinoa flour, but quinoa flakes, plus a hefty 2 teaspoons of nutmeg. Unusual, to say the least.

They came out of the oven much being more attractive than I had anticipated; a crackled top, slightly crispy edges, soft on the inside, flecked all over with the white quinoa flakes. The quinoa flavor is much more subtle than I had hoped - it was rather overpowered by the nutmeg. If I made these again, I would definitely tone the nutmeg down. If you're not sure about your feelings on quinoa, however, you may want to leave the nutmeg as is. I suspect it helps ease people in to the flavor of quinoa which some find to be an acquired taste.

I really enjoyed these cookies, and was surprised at how effortlessly the quinoa fit in. Though I did hope the flavor would be a little more outstanding, though it was there, and very tasty. I used palm sugar as my sweetener, which was a lovely complement to the quinoa and nutmeg. I found them to be a tad on the salty side - which is not something I ever say, I love salty - so you may want to use 1/2 teaspoon less. It just occurred to me that these would also be fantastic as thumbprints, filled with jam or even a nut butter - I'll have to try them that way with some of my remaining dough.

*** Update *** I tasted a cookie on its second day and the nutmeg had mellowed considerably. If you're going to serve the cookies immediately, I would still recommend using a little less nutmeg, but if you think they'll be around a couple of days you may want to leave it as is.


Quinoa Cookies
adapted from Good to the Grain by Kim Boyce


2 1/2 cups white whole wheat flour
1/2 cup quinoa flour
2 teaspoons kosher salt
1 1/2 teaspoons baking powder
1 teaspoon baking soda
2 teaspoons freshly grated nutmeg
8 ounces cold unsalted butter, cut into small pieces
2 cups palm sugar
2 tablespoons molasses (not blackstrap)
2 eggs
2 teaspoons vanilla extract
1 1/2 cups whole oats
1 cup quinoa flakes + 3/4 cup for rolling

Preheat oven to 350. Line baking sheet with parchment. Combine flours, baking powder, baking soda, salt and nutmeg in a medium bowl, set aside. In the bowl of a stand mixer fitted with the paddle attachment, combine butter and sugar and mix on low until just blended, about 2 minutes. Add the eggs one at a time, mixing for about a minute after each addition. Stir in molasses and vanilla. Add flour mixture and mix on low until flour is barely combined. Add oats and one cup of quinoa flakes mixing until just combined. Don't be concerned if the dough seems crumbly, it will come together when you form it into balls. Place remaining 3/4 cup quinoa flakes in shallow bowl. Form dough into balls about 3 tablespoons in size and roll in flakes to cover them completely. Place balls in baking sheet about 3 inches apart. Bake for about 5-18 minutes, until cookies have spread, cracked and are an even golden brown. Let cool on baking sheet.


Thursday, April 29, 2010

TWD: Chockablock Cookies

I've always been a bit of a procrastinator. If there's something I'm not 100% excited about doing, I'll wait until the absolute last minute to do it. I actually baked and photographed these cookies on Tuesday. I loved the cookies, but wasn't thrilled with the photos so I've been dragging my heels on writing this post... Here goes...

This week's TWD treat is a delightful cookie with endless possiblilities for playing around! It is an oatmeal cookie with your choice of dried fruit and nuts, plus coconut and chocolate - though in the interest of feeding them to my children, I left the chocolate out. There's a first time for everything...

I used a combination of dates and pecans, which I just love together. Since I omitted the chocolate, I added a little extra of all of the other add-ins. Not surprisingly, I sweetened my cookies with palm sugar and an unbelievable local molasses. I also used all butter instead of part butter, part shortening.

These cookies are thick, soft, chewy, chock full of goodies and almost healthy enough to call breakfast! One of my favorite things about them is that the molasses is a very prominent flavor. It was a welcome surprise! I think using palm sugar as my second sweetener helped to highlight the molasses, as it is itself rather dark in flavor.

Thanks to Mary of Popsicles and Sandy Feet for choosing this wonderful cookie for us to bake! The recipe is on her blog.


Friday, April 9, 2010

Creamy Meyer Lemon Crumb Bars


I am powerless when it comes to desserts with streusel topping. I see them, and I have to make them. As soon as The Pioneer Woman posted these crumb bars I knew I would be eating them soon. I had a little time on my hands this afternoon while nursing my sick kiddo back to health, and as there were a few Meyer lemons dying on my counter - having already made these cookies, as well as some preserved lemons which I have yet to post - I decided to put them to good use! Thankfully, I had a can of sweetened condensed milk, and I whipped these bars up in no time.

I love crumb bars because they are so easy to make, plus, one dough used in two different ways creates two different textures. Brilliant! Pair that with a simple, yet delicious filling and you have a real winner on your hands.


These bars - though not terribly photogenic - are unbelievably creamy and delicious with a light, refreshing tang from the fresh lemon juice and zest - if you look closely, you can see the flecks of yellow, mmm... After only about 25 minutes in the oven, the filling takes on a texture very similar to cheesecake - a delightful discovery! As PW mentions, you could change it up a little, use lime for the juice and zest and have lime bars, add thyme for lemon-thyme bars, or alternatively, I had the thought that fresh ginger would be amazing in them. I only wish I had had the idea before my bars came out of - or went into, for that matter - the oven. Ah well, next time...


Creamy Meyer Lemon Crumb Bars
adapted from The Pioneer Woman

1/2 cup (4 ounces) unsalted butter, slightly softened
1 cup brown sugar, lightly packed
1 cup oats
1 1/3 cups white whole wheat flour
1 teaspoon baking powder
1/2 teaspoon salt
1/2 cup fresh Meyer lemon juice
zest from two small Meyer lemons

Preheat oven to 350.

For crust/crumble:
Combine butter, brown sugar, flour, oats, baking powder and salt in a medium bowl. Blend with your fingers until all ingredients are evenly moistened and there is no visible loose flour. Press 1/2 of the mixture evenly into the bottom of a 9"x 13" pan - you could go a little smaller with the pan, but don't go any larger. Set aside the remaining half of the mixture.

For the filling:
In a medium bowl, combine sweetened condensed milk, lemon juice and lemon zest. Whisk until well combined. Pour evenly over crust layer.

Scatter remaining crust/crumble mixture over filling - I like to have a variety of chunk sizes in my crumble toppings, but The Pioneer Woman spread hers in a thin, even layer. Use whichever method sounds better to you. Bake for around 25 minutes, or until crumble is golden. After bars have cooled in pan for 30 minutes, cut into squares with a sharp knife, then place pan in fridge for 2 hours or more before serving.


Friday, April 2, 2010

Meyer Lemon, Lavender and Cashew Shortbread


While people in many parts of the country are already enjoying the first produce of spring, we in Asheville have yet to have that pleasure. Thankfully, the farmer's markets start up again in the next few weeks, but until then it is still the fruits of winter that I'll be eating. I don't think I've ever had such a variety of lemon desserts as I've had this winter, and I have been enjoying them so much.


One thing I hadn't made yet was lemon cookies. Given my love for cookies, it is surprising that I waited this long to make them, but here they are!


I knew I wanted to use Meyer lemons, and pair them with lavender. I found this recipe from Canelle et Vanille and made a few tweaks, ending up with these lovely cookies.


These cookies manage to be spring-like, despite their use of winter fruit; the brightness of the lemon, the sheer fact that they contain flowers; the happy flecks of yellow and purple throughout.

They have the perfect shortbread texture, as well; crispy with a tender crumb, flaky and not at all chalky. I can't stand those shortbreads that stick to the roof of your mouth.

The only change I might make should I bake these again would be to add more cashews. I was hoping they would play a stronger role here, but there were so few they weren't really noticeable at all. I questioned the amount as I was weighing them - I should have trusted my instincts...


Meyer Lemon, Lavender and Cashew Shortbread
adapted from Canelle et Vanille

110 grams butter, softened
30 grams powdered sugar
zest of two small Meyer lemons
1 tablespoon Meyer lemon juice
1 tablespoon dried culinary lavender buds
140 grams white wheat flour
2 grams salt
30 grams (though I would actually double this next time) chopped cashews
granulated sugar for dusting

In the bowl of a stand mixer fitted with the paddle attachment, beat the butter and powdered sugar until creamy. Add lemon zest, lemon juice and lavender buds, and mix to combine. Add flour and salt and mix until just combined. Stir in cashews. Roll dough between two sheets of parchment to about 1/4" thick. Carefully fold edges of parchment around dough, turn dough over so it keeps the folds closed, and place dough flat in refrigerator for at least two hours. Remove dough, preheat oven to 350, and cut into whatever shapes you desire. Place about 1/2 inch apart on parchment lined baking sheet, and dust evenly with granulated sugar. Bake for 14-16 minutes, or until lightly golden - a little more so around the edges. Let cool on baking sheet.


Wednesday, March 31, 2010

Oatmeal Shortbread


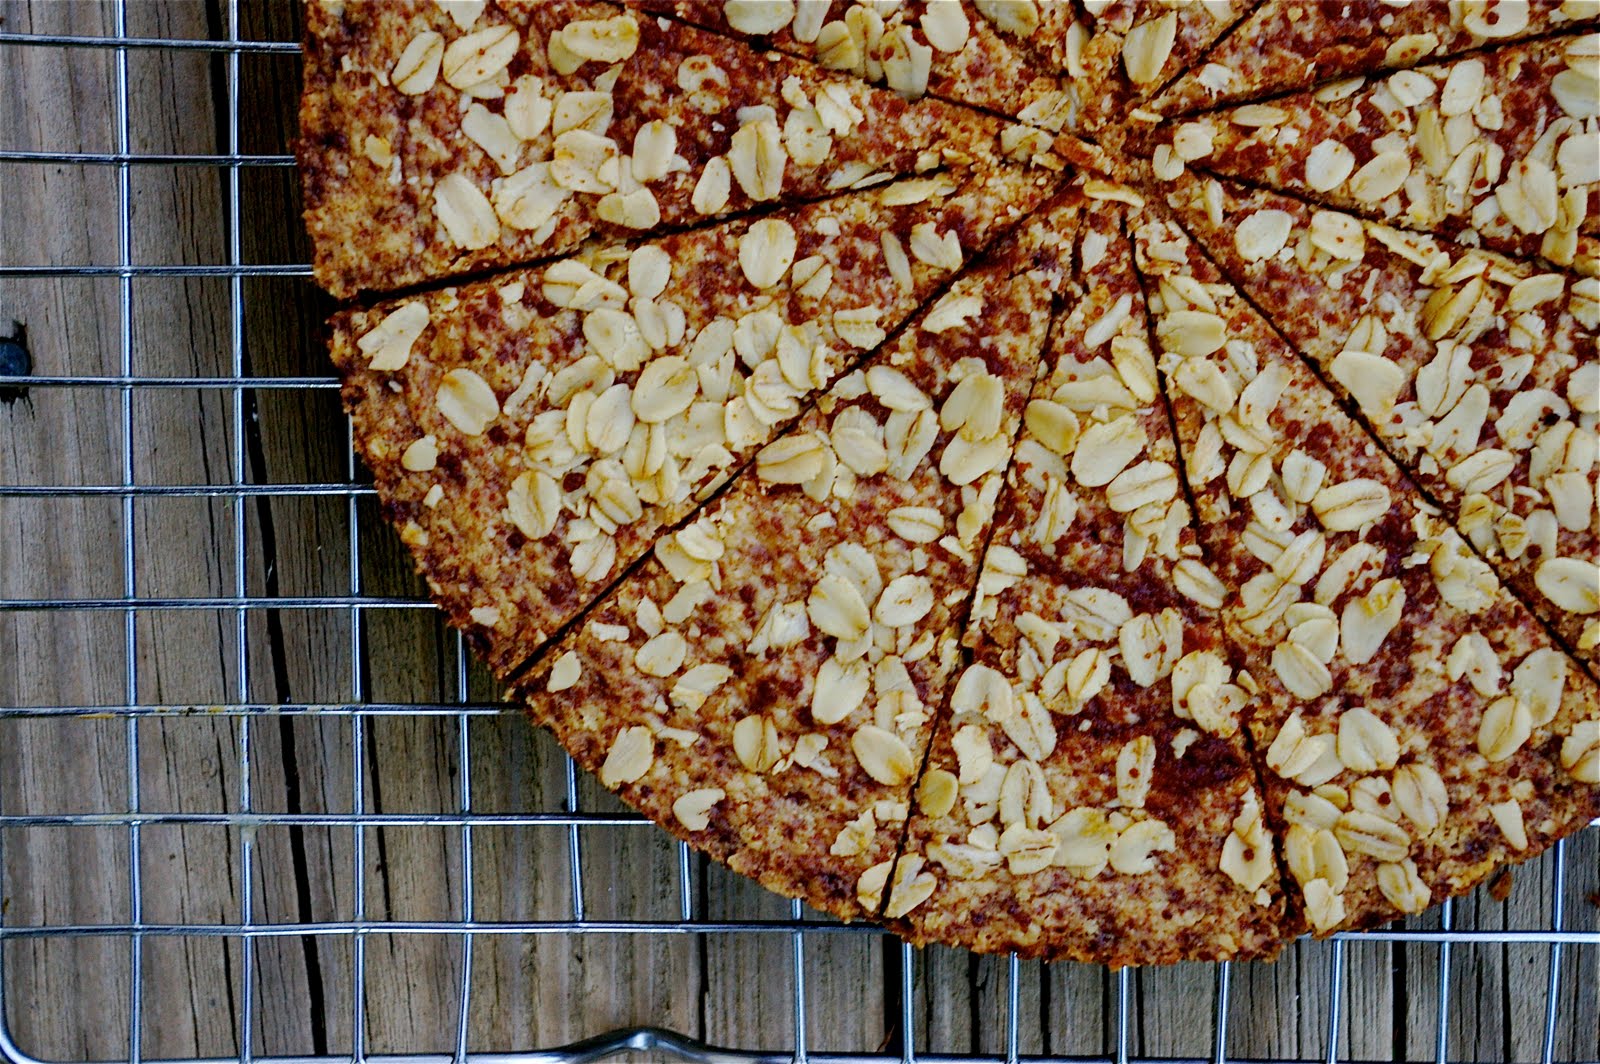
When I was a junior in college, I spent a semester abroad in London. I have many incredible memories from that time, among them, the digestive biscuits that I consumed with great gusto. There were many varieties I enjoyed, but one of my favorites was a thin, unassuming oaty biscuit that was somewhere between a cookie and a cracker - might they be called Hob Nobs? - that was barely sweet, and had a wonderful nubby, crumbly texture. With the first bite I took of this shortbread, I immediately thought of those lovely cookies.

This is unlike any other shortbread I've ever had. Usually characterized by its buttery melt-in-your-mouth texture, this version is less refined and a little more homey in its appearance, but it loses nothing in flavor. It is actually very similar to the Sbrisolona I made a few months ago in many respects despite the fact that it contains no nuts - the signature of Sbrisolona. The oats add a fantastic flakiness to the shortbread, making it at the same time light, soft, crispy and crumbly.

I love the fact that there is so little sugar in this recipe, as I'm quite fond of desserts that are subtly sweet. My little ones haven't tasted it yet, but I feel sure they'll approve.


Oatmeal Shortbread
adapted from Pastry Studio


1 cup white wheat flour
1/2 cup whole rolled oats + some for dusting
1/3 cup palm sugar + some for dusting
1/2 teaspoon salt
12 tablespoons cold unsalted butter, cut into several chunks
1 teaspoon vanilla extract

Preheat oven to 325. Butter an 8" spring-form cake pan or tart pan. In the bowl of a food processor, combine flour, oats, palm sugar and salt. Pulse a few times to combine. Add butter and vanilla and process until dough forms a ball. Press dough evenly in prepared pan, and sprinkle with a light layer of oats and palm sugar. Bake for about an hour, or until shortbread has taken on a deep golden color. Let cool on rack for 10 minutes, then remove sides of pan, and cut shortbread with a sharp knife while still warm.


Tuesday, March 23, 2010

TWD: Dulce de Leche Duos (and my 1 year blogiversary!)


Look at this; it is Tuesday, and I'm actually posting the TWD treat on its appointed day & week!!! Miracles do happen...

So, today is my one year blogiversary... I had big plans... They didn't so much work out... Now I'm left with these horrible photos of some insanely delicious cookies - I can't wait until I get my camera back from being repaired!!!

I always had a lot of interests growing up, and not to toot my own horn, but I was pretty good at everything I tried, so I was always a little confused about what I should do when I grew up. Through the confusion, however, there was always one thing I could unequivocally tell you I would never be: a writer. Writing was always something that I found to be very stressful - unless it was a completely impersonal essay. Those I could crank out by the dozens. I don't know that I consider myself to be a writer, but I do write on a regular basis, and that is certainly something I never thought I would do. Even more surprising is that I actually enjoy it. Love it, in fact.

When I started this blog, I don't know that I ever expected anyone to read it. It still surprises and delights me when I look at the number of hits I've gotten on a given day or week, and the locations from across the globe that I get visitors from.

Having a food blog is one of the most satisfying endeavors I've ever taken on. There are so many stages of activity; finding a recipe, creating the food, photographing it, of course eating it, writing about it, and then waiting a bit for that little piece of yourself to make its way into other people's homes and see how they react to your offering.

The food blogging community is overwhelmingly supportive, accepting, giving. It is something I am incredible proud to be a part of.

All of the interests I have had throughout my life have to do with creating things. When I was 8, I had my first business with a friend. It was called Eternal Light, and we made custom candles and jewelry that we sold to our teachers and classmates. We even had business cards. I've knitted since I was six, cooked from about the same age, taken photographs, done darkroom work, and then for many years I performed. I sang, I danced, I acted. I even studied this in college. Every one of these things from beading to singing was a form of expression, a creative outlet, something that made me who I am.

I had my first son in 2006, when I was 26, and I became so consumed with being a parent that I stopped doing things for myself. I stopped creating. Then came marriage problems, then another baby, throw in a new business and you've got a big stressful mess with no room for anything else. Not to mention, there was never a time that I actually had two hands free to create anything with... Then one day, I looked at my friend Teanna's Facebook page, and saw a link with a funny name and I thought I'd check it out. I was led to Spork or Foon, Teanna's witty, hilarious and beautifully photographed food blog. Her blog led me to discover Tuesdays with Dorie, and a number of other blogs that I love and visit on a regular basis. I toyed with the idea of starting my own, but felt self-conscious about putting myself out there in that way. Then one year ago today I took the dive, and I couldn't be happier about having made that decision.

I have emerged from a several-year funk through having this blog. I have once again found an outlet that is satisfying and nourishing and brings me a sense of purpose aside from being a parent to the two sweetest boys I could ever ask for.

Thank you to everyone who reads my little blog, to everyone who has ever left a comment, a word of encouragement. It means so much to me.

Through this transition into being a single parent, I am trying to find my way back to baking and blogging more. I have less time now, so I have to be more efficient in everything I do. I'm working on it.

In case all you want is to hear what I thought of these cookies, here it is: I have wanted someone to pick these cookies for months. Ever since I first noticed them in the book. Especially after I made dulce de leche for the first time. I was so excited to see them on the March schedule. I baked the first batch, and honestly, wasn't wowed. I used the amount of dough Dorie recommended, and the cookies spread like crazy, and they were just too big, and too soft. So I made them half the size and baked them for a little longer. Magic.

My first thought when biting into one of these cookies was sugar. It was like eating rich caramel-y sugar. Three textures of sugar to be more precise; the center is creamy and gooey, then there is the outside of the cookie which forms a crispy sugary crust when baked, and the inside of the cookie which is dense, chewy, soft. These are amazing. And dangerous. Oh, so dangerous. If you know what's good for you, you won't make them. But if you do, triple the amount of salt in the recipe, it is rather salt-poor (1/4 teaspoon), and needs that extra bit to help off-set some of the sweetness. Even tripled, the cookies aren't salty.

This cookie was chosen by Jodie of Beansy Loves Cake. The recipe can be found on her blog.


Sunday, March 21, 2010

TWD: Pistachio & Sicilian Orange Thumbprints


I know, I know, I'm almost two weeks late here... This is the cookie that all of the other TWDers baked week before last, and I really didn't want to skip it. I have a cookbook that has pistachio thumbprints filled with rose petal jam, and I was planning on that combo, but when I opened my rose petal jam, it had mold in it... The only other jam I had was Sicilian Orange. I was skeptical at first about combining it with the pistachios, but in the end it was a fantastic choice. These are some seriously delicious cookies.


Please, no fried egg comments, I know what my little cookies resemble... You'll have to forgive them their appearance, because they really are something special. The Sicilian Orange jam has an almost bitter tartness that plays beautifully off of the creamy sweet pistachios. The cookie is a soft nutty shortbread that almost melts in your mouth. I had to get them out of the house promptly, because I found myself gobbling up one after another. After another...


I'm going to have to make these again one day soon using palm sugar, because I know my boys would be crazy for them, too. I didn't use palm sugar this time because the jam I was planning on using had sugar in it...

The only thing I might do differently next time is to leave out the almond extract and see what that does. Though there isn't a lot, it is a prominent - though tasty - flavor, and I'd like to see how the cookie is affected by removing it. Other than that, these are wonderful.

So, thanks so much to Mike of Ugly Food for an Ugly Dude for picking this fantastic cookie for us all to bake! The recipe is on his blog.

And with this, I'm really hoping to be back into the TWD swing of things, I've missed it the past few weeks!

The next TWD treat on the agenda is Dulce de Leche duos. Stay tuned, you won't want to miss this one!


Wednesday, March 17, 2010

200th Post!!! Outrageous Bittersweet Chocolate Chunk Cookies


While I haven't been here as much as I've wanted to lately, I can hardly believe that this is my 200th post! I have always been the type of person that gets incredibly excited about things, does them for a short while, than loses interest. The fact that blogging has become more fulfilling over the last (almost) year is just amazing to me. The food blogging community is truly an incredible thing to be a part of.


These cookies are perhaps the most chocolatey thing I've ever eaten. I've eaten a whole lot of chocolate in my time, so that's really saying something. They are dense, have a brownie-like crust, and are so full of chocolate chunks that they melt in your mouth. In fact, as I was adding the chocolate to the batter, I had a hard time telling which element there was more of.


The batter is supremely easy to make (though is not quite as lightning quick as these lovelies) and could be made gluten free by replacing the flour with cocoa powder.


My mom is probably the toughest baked goods critic around, and she dubbed these the best chocolate cookies she had ever eaten. She said they were better than World Peace Cookies. Better than World Peace Cookies?! Now I don't know that I'm willing to go that far, but they are at least equally as good. They are unbelievable.


Outrageous Bittersweet Chocolate Chunk Cookies
adapted from Martha Stewart

8 ounces roughly chopped bittersweet chocolate
4 tablespoons unsalted butter
2/3 cup unbleached white flour
1/2 teaspoon baking powder
heaping 1/2 teaspoon salt
2 large eggs
3/4 cup packed light brown sugar
1 teaspoon vanilla extract
12 ounces bittersweet chocolate, chopped into chip-sized pieces

Preheat oven to 350. Line a baking sheet with parchment, set aside. In a heat-proof bowl placed over a pot of simmering water, melt the 8 ounces of chocolate and butter, stirring occasionally. Meanwhile, combine flour, baking powder and salt in a small bowl and set aside. In the bowl of a stand mixer fitted with the whisk attachment, beat the eggs and sugar on high until pale and thick, about 3 minutes. Turn mixer to low and add melted chocolate in a thin stream until combined. Add flour mixture and stir until just combined. Using a rubber spatula, fold in chocolate chunks. Drop heaping tablespoons of batter on prepared cookie sheet, 2-3 inches apart. Bake for 12-14 minutes, until cookies are dry and cracked but still soft in the center. Cool on baking sheet for 10 minutes, then transfer on parchment to cooling rack. Repeat with remaining batter. If you want your cookies to be the most attractive, spoon all of the batter out while it is still warm. As it cools it will harden, resulting in a slightly thicker cookie with a little less of a crust. These photos are all cookies made from warm batter.


Wednesday, March 3, 2010

Almond Butter Thumbprints


I'm always trying to create new treats that I think my boys will enjoy. Sometimes I fail miserably, but sometimes I hit upon a winner. These cookies are a serious winner.

Though I had the idea about a year ago, it took me until last month to make a peanut butter cookie with almond butter. I've now made them three times in two weeks, and my little ones can't get enough. These are some of the easiest and simplest cookies I've ever made, and their taste far outshines their appearance.


These humble little cookies may not be pretty, but they are fantastic. They are full of almond flavor, which pairs beautifully with palm sugar; the chunky almond butter gives the cookies a wonderful nubby texture, and the cookies are satisfyingly dense. The dab of jam lightens them up and provides a lovely counterpoint to the richness from the nut butter. I can't get enough of them either!

Don't be alarmed if the dough seems greasy, they won't bake up that way.


Almond Butter Thumbprints

1 cup almond butter
1/4 cup (1/2 stick, 4 tablespoons, 2 ounces) unsalted butter, softened
3/4 cup palm sugar
1 egg
1 teaspoon vanilla extract
3/4 cup unbleached white flour
1/4 teaspoon baking soda
1/2 teaspoon salt
jam

Preheat oven to 350. Line a baking sheet with parchment, set aside. In the bowl of a stand mixer fitted with the paddle attachment, beat the almond butter, butter and palm sugar until fluffy. Add egg, and beat until combined. Stir in vanilla. Add flour, baking soda and salt, and mix until just combined. Form dough into balls about 1 inch in diameter, or 1 ounce each. Flatten ball into disk, and form a small well in the center with a fingertip. Place disks 1 1/2 inches apart on prepared baking sheet. Spoon a dollop of jam - I use sugar-free fruit spread, use what you like - into each well you've created. About 1/2 teaspoon should do. Bake cookies for 12-14 minutes, or until very lightly browned. Cool completely on baking sheet.


Friday, February 26, 2010

The Chocolate Chip Cookies


It's about time, isn't it?! I can't believe I haven't posted in so long. And here I am with another chocolate chip cookie... I hope you're not tired of them. There have been many factors to my absence, not the least of which is the fact that I've baked several things that I wasn't really crazy about, and I have a hard time posting sub-par treats. These cookies, however are anything but sub-par.


These are the cookies that I surmised about in my last post. These are the Perfect Cookie and New York Times cookie hybrid. These are the cookies. The cookies.


They are drawn more from the NYT recipe than the CI one, the only real contribution from CI being the brown butter. What a contribution it is, though! I will never make another chocolate chip cookie without brown butter. It does add an extra step, but it is well worth it. I find it fascinating that the actual brown butter flavor doesn't really come through here. I tasted several to make sure. What it does is deepens the flavor of the cookie, tempers the sweetness and imparts a slight nuttiness. It is a smooth and subtle addition, one that highlights the tastes already present and seamlessly ties all of the elements together.


These fulfill all of my requirements for a perfect chocolate chip cookie: they are dense and chewy on the inside, with a crispy and sturdy outer shell; the flavor of the cookie itself is rich and complex and mysterious due to the brown butter; the balance of cookie to chocolate is right on and the sprinkle of salt on top is the perfect finish.


I have no criticisms of this cookie. None. They were given enthusiastic thumbs up by everyone who tasted them, were the winner of a blind taste test with this cookie, and my mom deemed them the best chocolate chip cookies she's ever had. That's the real ccc test, people. If my mom approves, it is a true winner.


The Chocolate Chip Cookies
adapted from The New York Times and Cook's Illustrated


8 1/2 ounces unbleached white flour
1/2 + 1/8 teaspoon baking soda
3/4 teaspoon baking powder
3/4 teaspoon salt
10 tablespoons (5 ounces) unsalted butter, browned
5 ounces light brown sugar
4 ounces granulated sugar
1 large egg
1 teaspoon vanilla
10 ounces bittersweet chocolate, chopped into chip-sized pieces


Combine flour, baking soda, baking powder and salt, set aside. In the bowl of a stand mixer fitted with the paddle attachment, combine sugars. Pour hot brown butter over sugars, and without stirring, place in refrigerator to cool the butter to room temperature. Attach bowl to mixer and on medium speed, beat until light in color and fluffy. If butter isn't becoming pale, it isn't cool enough. Pop it back in the fridge for a few more minutes and try again. When butter mixture is desired consistency, add egg and beat for 30 seconds. Stir in vanilla. Add dry ingredients, and mix until just incorporated. Stir in chocolate. Form dough into a log and wrap in plastic. Refrigerate for at least 24 hours (if you can stand to. If not, I understand). When ready to bake, preheat oven to 350 and line a baking sheet with parchment. Form dough into balls a little over an inch in diameter, or 1.5 ounces. Place balls at least 2" apart on baking sheet, and sprinkle with coarse sea salt. Bake for about 15 minutes, or until slightly puffy, dry on top and tinged with golden. Let cool completely on baking sheet.


Related Posts with Thumbnails

ShareThis