Tuesday, December 1, 2009

Peanut Butter Truffle Tart


It's strange how tastes evolve over time, isn't it? I've mentioned this before, but I used to loathe chocolate. I'm actually cracking up as I type that, so comical is the concept to me now... Well, another thing I couldn't stand was peanut butter. Actually, pizza too. I know, what kind of child was I?! To give you a hint, my favorite food was (and still is, actually) broccoli. Steamed. With olive oil and salt. Anyway, we're not talking about broccoli here, we're talking about a tart. A tart that contains two ingredients I would never have eaten 15 years ago, and that would have been a shame, because it is divine.

For his birthday (which was yesterday), my favorite uncle requested a chocolate-peanut butter tart. I knew I wanted it to be rich, and that chocolate needed to be the dominant flavor. One of my all-time favorite desserts is a truffle tart - basically ganache in a cookie crust - so I decided to do a riff on that concept.

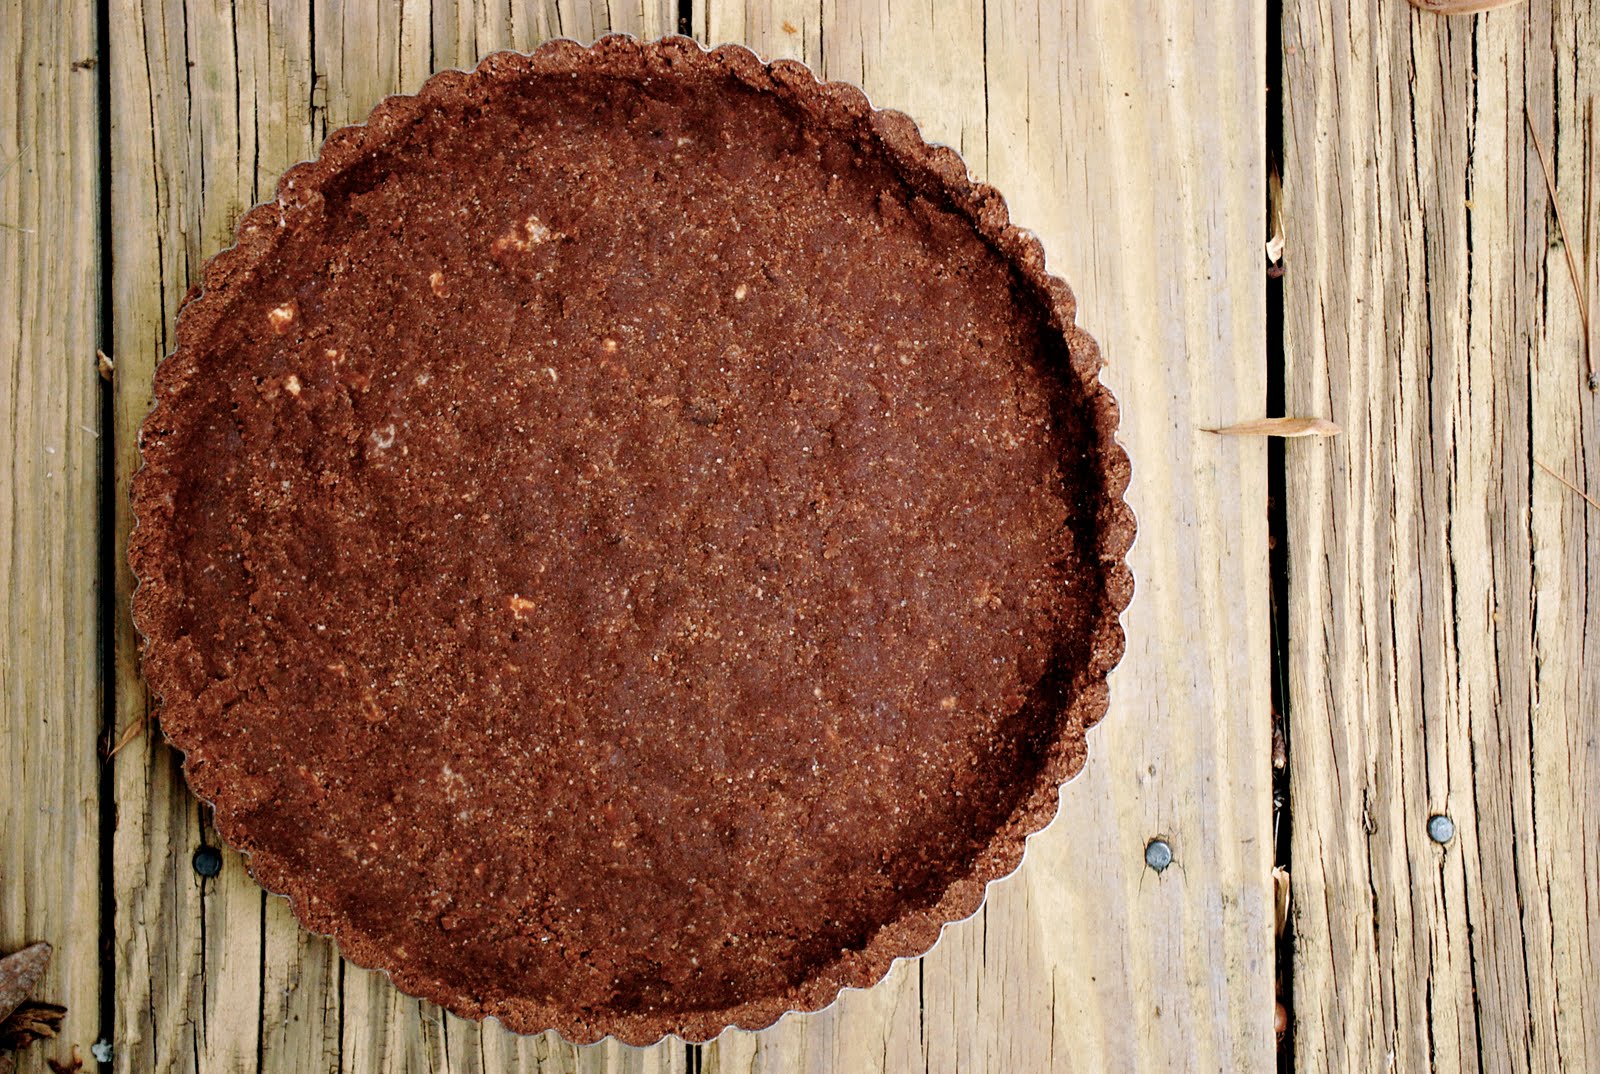
For the crust, I wanted something similar to a cookie crust in texture, but not as sweet, so I came up with this one. It was perfect.

For the filling, I made a basic ganache with semisweet chocolate and poured it over a layer of thinned peanut butter that was spread on the crust.

The dessert was a huge hit. Many of my family members put it in their top 5 desserts I've made.

I should mention that my tart used to have a beautiful, smooth, shiny surface. We had my uncle's birthday lunch at his favorite restaurant, and I took the tart there for everyone to enjoy after our meal. After everyone had had a slice (or two) and the leftovers were packed up to go home with people, there was one perfect slice left that I was saving to photograph. As we were walking in the house, my husband dropped the tart pan (containing my one perfect slice) on the floor. It was smooshed. It was dented. The crust was cracked. It was no longer smooth and shiny. It was a mess. I salvaged it as best I could, and hacked up the top of it, trying to mask the damage. It certainly looks better in the photos than it did immediately after its accident, but it was a lot prettier and more sophisticated before it...


Peanut Butter Truffle Tart


Whole Wheat Chocolate No-Roll Crust

3/4 cup + 1 tablespoon whole wheat flour
1/2 cup + 1 tablespoon unbleached white flour
1/4 cup cocoa powder
3/4 teaspoon salt
4 tablespoons + 1 teaspoon sugar
1/4 teaspoon baking powder
1 tablespoon cream cheese, softened
4 tablespoons butter cut into small pieces and frozen
4 tablespoons ghee, melted and cooled
2 tablespoons cold heavy cream

In a medium sized bowl, combine flours, cocoa powder, salt, sugar and baking powder. Set aside. Add cream cheese and butter and using a pastry blender, cut them in until well incorporated and there are butter bits of various sizes, though none terribly large. Combine heavy cream and ghee and add a little at a time to the flour mixture, tossing with your fingers as you add it. When all of the liquid has been added, use your hands to squeeze all of the ingredients to form a dough. It is okay if it is crumbly, though you want to make sure all of the dry ingredients have been moistened. Dump dough into well-buttered 9" tart pan with a removable bottom (or a 9" pie pan), and press in evenly. Place crust in freezer for at least 30 minutes, and preheat oven to 375. To blind bake, press a piece of aluminum foil over the crust and bake covered for 10 minutes. Remove foil and bake for another 15, or until crust feels slightly firm to the touch. Let crust cool completely before filling.


Filling

1/3 cup peanut butter
3+ tablespoons heavy cream


8 ounces best quality semisweet chocolate, finely chopped
1 cup heavy cream
2 tablespoons unsalted butter

Combine peanut butter with cream 1 tablespoon at a time, until peanut butter is still thick, but easily spreadable. The thicker your peanut butter is to begin with, the more cream you'll need. I use fresh ground organic peanut butter that I grind at the health food store, so it is rather thick. When peanut butter is the appropriate consistency, spread it across the bottom of your tart crust.

Place chopped chocolate in heatproof bowl. Bring cream to a boil, then pour over chocolate. Let stand 1 minute, then stir until chocolate is smooth. Stir in butter. Pour over peanut butter layer, and smooth with a spatula. Place in refrigerator for at least 1 hour to set the ganache. Remove from fridge at least 30 minutes before serving to bring to room temperature.




Monday, November 30, 2009

Chocolate No-Roll Crust for Pies & Tarts


Today is my uncle's birthday. He requested a chocolate peanut butter tart for the occasion, which I was happy to provide him with. As I was planning his tart, I was thinking about the crust I was going to make. I didn't want to go with a traditional tart crust. I wanted something more like a cookie-crust, but not as sweet. I immediately thought of the no-roll crust I originally saw on Joy the Baker - which I have already done two adaptations of - and wondering if I could figure out a chocolate version.

I decided to stick with partial whole wheat flour, which I wanted for it's texture and earthiness. I added sugar to this crust, which I omitted from the other two, and obviously I added cocoa powder. It worked out perfectly on the first try! I was so happy with this crust, I had to give it its own post (though I will post the tart I used it for tomorrow). This crust has a wonderful chocolate flavor that is just sweet enough, and the the texture is sandy and crumbly (though it stays together beautifully). It was everything I wanted it to be. It is a perfect alternative to a cookie crust, and nearly as easy to make. This one is a keeper!


Whole Wheat Chocolate No-Roll Crust

3/4 cup + 1 tablespoon whole wheat flour
1/2 cup + 1 tablespoon unbleached white flour
1/4 cup cocoa powder
3/4 teaspoon salt
4 tablespoons + 1 teaspoon sugar
1/4 teaspoon baking powder
1 tablespoon cream cheese, softened
4 tablespoons butter cut into small pieces and frozen
4 tablespoons ghee, melted and cooled
2 tablespoons cold heavy cream

In a medium sized bowl, combine flours, cocoa powder, salt, sugar and baking powder. Set aside. Add cream cheese and butter and using a pastry blender, cut them in until well incorporated and there are butter bits of various sizes, though none terribly large. Combine heavy cream and ghee and add a little at a time to the flour mixture, tossing with your fingers as you add it. When all of the liquid has been added, use your hands to squeeze all of the ingredients to form a dough. It is okay if it is crumbly, though you want to make sure all of the dry ingredients have been moistened. Dump dough into well-buttered 9" tart pan with a removable bottom (or a 9" pie pan), and press in evenly. Place crust in freezer for at least 30 minutes, and preheat oven to 375. To blind bake, press a piece of aluminum foil over the crust and bake covered for 10 minutes. Remove foil and bake for another 15, or until crust feels slightly firm to the touch. Let crust cool completely before filling.


Sunday, November 29, 2009

SMS: Raised Waffles with Warm Palm Sugar Bananas


I have not been a good SMSer lately, and I apologize to my fellow bakers! I skipped last week, and then I went and skipped this week's recipe, plus I've been a terrible commenter. At least a new year is coming up and I can resolve to be better...

In the meantime, I have some fantastic waffles for you. (Which were actually the pick for last week, so I am making an attempt to catch up.)

I received a wonderful cast iron waffle maker for Mother's Day this year, though had yet to make any waffles with it, because it required seasoning, and I hadn't gotten around to it. I was so excited to finally pull it out and put in the work to make it useable, because it made the best waffles I have ever eaten. I'm not sure how much of that can be attributed to the waffle iron and how much to the recipe, but let me tell you, these were fantastic.

The texture was amazing. I have never had a waffle that was so crispy on the outside, and so tender on the inside. No sogginess here, even when drenched in maple syrup and warm bananas. We folded ours over to eat them like a sandwich, with all of the bananas and maple syrup on the inside. Oh my. I was so glad I only made a half recipe, so that 2 waffles was my limit...

I made a lot of changes in the recipe: I used instant yeast, I doubled the amount of nutmeg and added 1/2 teaspoon cinnamon (remember, this was a half recipe), added 1 teaspoon vanilla extract, used 3 teaspoons of palm sugar, and I was out of eggs so I used 2 tablespoons of tapioca powder as an egg substitute.

The banana topping was divine. I used palm sugar in place of brown sugar, and added about 1/2 teaspoon vanilla extract. I didn't put the maple syrup in the topping, but poured it on my waffles separately, and it was wonderful.

This was the first raised waffle I have ever had, and I can certainly say it won't be the last.

This recipe was chosen by Lauren of Fried Pickles and Ice Cream. Sorry I was a little late with these, Lauren! You can find the recipe on her blog.


Friday, November 27, 2009

French Silk Pie


When I was young, a holiday was never a holiday without a French Silk Pie. It was one of my grandmother's specialties. She passed away when I was 9, and sadly, I never learned how to make it from her. After she passed away, we had many Thanksgivings and Christmases without this delicious dessert, until a few years ago when my aunt picked up the slack. This year I was in charge of the Thanksgiving sweet treats, so it was my turn to test my French Silk Pie making skills.

This is an amazing dessert for so many reasons. The crust is perfect - flaky and buttery. The pie is light and airy and melts in your mouth, it is rich and deeply chocolate-y, it looks like it took hours to make but it really only takes a matter of minutes (not including the time it takes to make the crust). It does contain raw eggs, but I think we can look past that, don't you? I mean if I can do it, so can you. I am not at all a fan of eggs, and this is far and away the only way you could ever get me to eat raw ones. I'm working on a version with cooked eggs - when I figure it out, I'll let you know. Until then, this is just too delicious to pass up because of a couple of raw eggs, so I hope you'll give it a try.


French Silk Pie

All-Butter Pie Crust
adapted from Good for Almost Everything Pie Crust by Dorie Greenspan

makes a 9" double crust

3 cups unbleached white flour
1 1/2 teaspoons salt
13 ounces (3 sticks + 2 tablespoons) unsalted butter, cut into small pieces and frozen
1/2 cup ice water

Combine flour and salt. Using a pastry blender, cut in butter until it is well-distributed. There should be pieces of butter in varying sizes. Add the water a little at a time, working the dough with your fingers to incorporate it. Add as much of the water as you need for the dough to form a ball. If you need a little extra water, go ahead and add it. When the dough has come together, divide it into two equal pieces. For a single crust, roll out one piece of dough on a well-floured board. Place in buttered 9" pie plate, trim the edges, and bake for about 25 minutes, or until golden brown. Let crust cool completely before filling.


Filling

4 oz best quality semisweet chocolate
1/2 cup unsalted butter, softened
1/4 cup sugar
1 teaspoon vanilla extract
2 eggs
1/2 cup heavy whipping cream + more for topping

In the bowl of a stand mixer, cream butter. After about 2 minutes, add the sugar and mix until light and fluffy. Add vanilla. Add eggs one at a time, beating for 1 minute after each addition. Meanwhile, melt chocolate in a heat-proof bowl set over a pan of simmering water. When chocolate is fluid, slowly add it to mixer in a thin stream. When all of the chocolate is incorporated, pour heavy cream in a thin stream and whip on high for about 2 minutes. Spoon filling into crust, and refrigerate for at least an hour before serving.

When ready to serve, remove pie from fridge and top with freshly whipped heavy cream that has been lightly sweetened with agave.


Buttermilk Fantails


I saw these rolls on Tracey's blog a while back, and kept them filed away in my memory, just waiting for an occasion to make them. Thanksgiving was the perfect excuse. I made these along with a flourless chocolate cake, sweet potato pie, French silk pie (post coming tomorrow) and cranberry sauce.

I love the look of these rolls, so festive, so fancy! The technique for making them is so simple, but the result is just stunning. They're also really fun to eat, as you can peel them away layer by layer. The way they're formed also gives a variety of textures which I loved - lots of crispy edges. The interior is fluffy and light and soft.

I was tempted to put some whole grain flour in these, or some fresh cut herbs, but in the end I made them basically as written. I thought the flavor of the rolls could be improved upon, so I wish I had done either (or both) of those additions. I will definitely be making these again, adding my own little tweaks.


Buttermilk Fantails
adapted from Gourmet, February 2009


7 tablespoons of butter, melted
2 teaspoons instant yeast
1/4 cup warm water
3 cups unbleached white flour
1 1/2 teaspoons salt
1/4-3/4 cup buttermilk

In the bowl of a stand mixer fitted with the paddle attachment, combine water, yeast, flour, salt and 6 tablespoons of melted butter. With mixer on low, add buttermilk in a thin stream until all dry ingredients are moistened and a soft dough forms. Switch to dough hook, and mix on medium speed until dough is smooth and elastic - about 5-7 minutes - adding more buttermilk or flour to achieve the proper consistency. Form dough into a ball. Place in an oiled bowl, rotating to coat the dough. Cover bowl with plastic wrap, and let it rise in a warm place until doubled in size. About 1 1/2 - 2 hours. While dough is rising, butter cups of a 12-cup muffin pan. When dough has risen, punch it down then divide it in two equal pieces. While working with the first piece, keep the second covered with plastic. Place first ball of dough on floured board, and roll it into a square about 12" x12" and 1/8 inch thick. Brush dough with half of the remaining melted butter. Cut the dough into six strips, about 2" wide. Stack all 6 strips on top of each other, butter side up. Cut stack into 6 equal pieces. Place each piece in a muffin cup, then peel way the layers so that they fan outward. Repeat with second ball of dough. Cover the rolls with a kitchen towel, and leave them in a warm place to rise for 1 - 1 1/2 hours, or until doubled in size - the rolls should fill the muffin cups. When the rolls are close to the end of their second rise, preheat oven to 375. Bake rolls for 20-25 minutes, or until they are golden brown.

Tracey has step-by-step photos on her blog if you want to take a look at how the rolls are formed.


Wednesday, November 25, 2009

Broccoli + Kale Pizza on a Quick and Easy Pizza Crust


Whoa! What is that?! Something savory? Something that could be considered *a meal*?! On my blog?! Okay, are you over your shock yet? Let's get to this pizza.

I saw the crust recipe months ago on The Way the Cookie Crumbles, and I've made it several times, though never took photos of it. I made it again today, after staring at the contents of my fridge and searching for inspiration, and knew I couldn't hold out on you any longer.

This is the perfect last-minute meal. It can be ready in 30 minutes from start to finish. That's right, homemade pizza in 30 minutes. So, if you're burned out from Thanksgiving cooking/baking and need a great meal today that requires little effort, this is the recipe for you.

It is a delicious crust; crispy around the edges, soft on the inside, buttery, flaky. It is like a thin crispy biscuit. This is definitely a recipe that you want to have in your arsenal.


Quick Baking Powder Pizza Dough
adapted from Vegetarian Classics by Jeanne Lemlin

2 1/2 cups unbleached white flour (plus more for dusting)
1 1/2 teaspoons baking powder
1/2 teaspoon salt
4 tablespoons cold unsalted butter, cut into small pieces
1 cup whole milk
cornmeal for sprinkling

Preheat oven to 500. Place baking stone on center rack. Combine flour, baking soda and salt in a large bowl. Add butter, and using a pastry blender, incorporate butter until mixture resembles coarse meal. Add milk slowly, only using as much as you need for all of the flour to be moistened. Knead 2 or 3 times in the bowl until dough forms a ball. Divide dough into 2 pieces for 2 12"pizzas or 4 for pieces for 4 8" pizzas. Sprinkle pizza peel with cornmeal. Dust ball of dough with flour, place on peel and roll out with floured rolling pin. The dough will puff in the oven, so roll it out fairly thin (1/8" or so) for the best results. Place in fridge while you prepare your toppings.

Broccoli + Kale Pizza

1 small bunch of broccoli (about 1/2 pound)
1/2 bunch of kale (about 6 leaves)
2 teaspoons olive oil
salt to taste
1 cup grated sharp white cheddar
1/4 cup fresh grated parmesan

Pour olive oil into skillet and heat over medium flame. Add salt. Cut broccoli into small pieces. Chiffonade kale. Add broccoli to skillet, stirring to coat with oil. After about 2 minutes, add kale, stirring until coated with oil. Cook for another 2 minutes, or until broccoli and kale are almost cooked.

Top crust with veggies. Cover in cheddar, then parmesan. Transfer from pizza peel to baking stone. Bake for 8-10 minutes, or until edges are nicely browned and crispy.


Tuesday, November 24, 2009

Dulce de Leche


Dulce de Leche is everywhere these days; in brownies, on ice cream, in ice cream, as a filling for cookies, on cake - you name it. Unfortunately, though the store I shop at (an enormous locally-owned health food store) does sell pre-made Dulce de Leche, they don't sell organic Dulce de Leche. Though I don't know if this is exactly a downside, as homemade is always better.

I finally bit the bullet a few weeks ago and bought a can of sweetened condensed milk to make my own. When I saw that ever reliable David Lebovitz had a recipe on his site for it, I tried it out. It was simple enough - pour can of sweetened condensed milk into a glass pie plate, place that in a water bath, cover pie plate with aluminum foil and leave it in the oven at 425 for 1 - 1 1/4 hours. Well, the result was tasty, but it wasn't smooth. The final instruction was to whisk until smooth, but I could have whisked until my arm fell off and it wouldn't have made a difference. It had chunks. Small chunks, but chunks nonetheless. It was also a little chalky. I was slightly horrified that I was unable to execute such simple instructions...

A couple of weeks went by, and I was sent this wonderful box of goodies from an acquaintance at Heavenly Organics (as I was doing a tasting for them in a local store). Including sweetened condensed milk. I was determined to try again. With a different technique. The result was pure heaven. Smooth, rich, creamy Dulce de Leche. Lick-the-bowl-clean Dulce de Leche. I don't think there is anything it wouldn't be delicious on. The perfect addition to your holiday table.

You'll be amazed at how easy it is to make.


Dulce de Leche

Pour can of sweetened condensed milk into a heat-proof bowl, and place over simmering water. Leave it for about 1 1/2 hours, stirring every 30 minutes or so with a whisk. Check the water periodically, adding more when necessary. The longer you leave it, the darker and thicker it will become. If you want it to be a sauce, pull it off the heat at around 1 1/2 hours. For thicker, scoop-able Dulce de Leche, it will be more like 3 hours. When your Dulce de Leche has reached your desired consistency, whisk it until smooth (though it should be nearly smooth already). Remember, it will thicken some as it cools, so keep this in mind when deciding how long to cook it for.


Related Posts with Thumbnails

ShareThis