Tuesday, April 28, 2009

Chocolate Cream Tart


This week's Tuesday's with Dorie recipe was for a chocolate cream tart. 

Let me start by saying that I am not a fan of custardy desserts, never have been. I can't stand the texture. I decided to give this tart a try, however, because I had never made pastry cream and wanted to give it a shot, plus the comments from the official TWD members were so positive that I thought maybe this tart would change my mind. 

I am so glad I gave this tart a shot. It consists of a bittersweet chocolate shortbread crust, chocolate pastry cream filling, and a whipped cream topping. It is delicious. Incredibly rich, but not heavy, and the texture of the filling was silky and divine.

All of the elements were fairly simple to put together, and I had so much fun making the pastry cream. 

I made a few changes to the recipe, but nothing major: the crust calls for 1 egg yolk, though in my excitement I neglected to notice the word "yolk" and put in an entire egg. It worked great anyway, and I baked it an extra 4 minutes to make sure it would be crunchy, not cakey; the pastry cream calls for bittersweet chocolate, but all I had on hand was semisweet so I used that and reduced the sugar from 6 tablespoons to 4 so it wouldn't be too sweet; the whipped topping calls for confectioner's sugar, but I prefer to put just a touch of honey in mine. All of the components of this tart work beautifully together, this recipe is definitely another winner! 

The above photo does not do this tart justice - I waited too long to photograph it, and it started to dry out around the edges... oh well... I promise it tastes a lot better than it looks in this photo. (It also looked a lot better 3 days ago when I made it)

Kim of Scrumptious Photography chose this recipe. You can find the recipe here.

Sunday, April 26, 2009

Sweet Melissa Sundays: Granola Breakfast Cookies


Anytime I can have an excuse for eating cookies for breakfast, I'll take it! This week's recipe for the SMS baking group was for these yummy cookies made with granola. I used all molasses instead of molasses and honey - my cookies are probably browner than other people's because of that, and used some all purpose flour instead of all whole wheat - I had no idea I was running so low on wheat - but otherwise I stayed true to the recipe. These cookies are incredibly easy and fast to make - not taking into account the time it takes to make the granola - and quite yummy. The granola has a lot of variety in it - pumpkin seeds, almonds, rye flakes, dried cherries, etc... so there are a lot of great textures and flavors in the cookie. They are nice and crisp on the outside, and wonderfully chewy on the inside. All in all, a very tasty cookie - and sugar-free, so my 2 1/2 year old son can eat them! (He loved them, by the way). Thank you to Jessica of A Singleton in the Kitchen for choosing this recipe. You can find the recipe here on Jessica's blog, and if you'd like to see the other SMS baker's creations, look here.

Tuesday, April 21, 2009

Mediterranean Pizza (with Broccoli)


After seeing the delectable asparagus, fingerling potato and goat cheese pizza on Wendy's blog Pink Stripes I was inspired to make pizza of my own this week. 

For my crust, I used the same recipe she did from The Bread Baker's Apprentice by Peter Reinhart . It was the October 2008 Daring Bakers challenge, and let me say how fantastic it is. It is unbelievably simple to make - especially in a stand mixer. The dough takes less than 10 minutes to put together, nd doesn't require multiple turns of kneading and rising - simple, simple, simple! This recipe calls for tossing the dough. I had never tossed pizza dough before, but I was eager to give it try. It wasn't a terribly graceful operation, but it was  lot of fun, and it worked! I used 2 of the 6 balls of dough that the recipe makes, and ended up with pizzas approximately 12" in diameter. 

I went a little crazy with the toppings, but it all worked together, and the pizzas were delicious. I topped them with locally made tomato sauce, broccoli, olives, sun-dried tomatoes, fresh parmesan, fresh mozzarella, gorgonzola, walnuts and fresh basil. So yummy. The recipe for the crust can be found here at Rosa's Yummy Yums

Sunday, April 19, 2009

No Sweet Melissa Sundays today...

My 2 1/2 year old and I both had a stomach bug for the last week - hence the lack of postings... He's completely over it, and I'm pretty much over it, but didn't quite feel up to baking :( 

I'm hoping to make the turnovers later this week and post them then. 

Tuesday, April 14, 2009

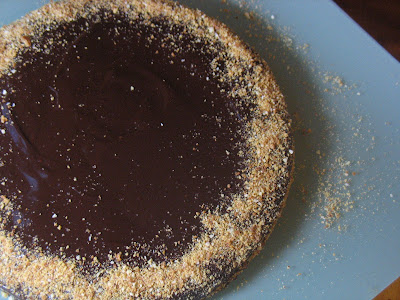
Chocolate Amaretti Torte


Wow, this has been a chocolate-filled week! No complaints here... This Tuesdays with Dorie recipe - a baking group that I am not officially a member of, but I'm baking along with them anyway - was chosen by Holly of Phemomenon, and it is a winner! As the recipe states, it is very easy to make - the whole thing is done in a food processor, and only takes about 15 minutes. It is then baked and topped with a rich ganache (which is about half as thick as the torte itself!). As compared with my Brooklyn Brownout Cake, this one turned out beautifully, and I am not at all embarrassed to take a photo of the whole thing. This is ganache as it should be - shiny and smooth. This torte is rich, dense and has a lovely almond flavor that comes from the amaretti cookies and almonds that are part of the batter. You can find the recipe on Holly's blog. This dessert is so easy and delicious, it is great for any occasion - and so beautiful, anyone you serve it to will think it took hours! This one is a keeper for sure!


Monday, April 13, 2009

Double Chocolate Brownies


This is a fabulous, super-chocolaty brownie recipe, courtesy of marthastewart.com. I made these for my Brooklyn Brownout Cake instead of the brownies in the Sweet Melissa book. I had made them before, and knew that I loved them - they are everything  brownie should be: dense and rich with a lovely flaky top. I waited a little too long to take photos so they dried out a bit - they are actually more fudgy than they appear to be. You can find the recipe here


Sunday, April 12, 2009

Sweet Melissa Sundays: Brooklyn Brownout Cake


I'm becoming a cake convert. This week's recipe for the Sweet Melissa Sunday bakers is for a delicious, dense, decadent chocolate cake filled with a brownie and ganache mixture, and topped with ganache. There isn't much you could do to make this cake more chocolaty. Right up my alley. I'll post the brownie recipe I used later this week. I baked this cake in two rectangular pans - one large, one small - and made two squareish cakes. 

So, I was a bit off my game today when making this cake. For starters, I forgot to measure my hot coffee, and ended up pouring too much in - I'm not sure how much, but I think it was around 1/4 cup or so. I compensated by adding an extra 2 tablespoons of flour. It seemed to work, because the cake was moist and delicious and done in 35 minutes exactly. Then I had a ganache mishap - not once but twice! I've made perfect ganache many times, but I just couldn't do it today. I think I over-mixed it, because it started separating and getting very oily. I used it anyway, and after the cake was refrigerated for about 30 minutes it firmed up nicely. Though there were some whitish spots where the oily parts of the ganache had hardened... 

Elyse of Elyse's Confectionary Creations chose this week's recipe, and let me say, her cake turned out to be much, MUCH more attractive than mine... Mine is so embarrassingly ugly, I couldn't even bring myself to take a shot of the whole cake. Looks aren't everything, though, and what it lacks in beauty, it more than makes up for in taste. Thanks to Elyse for choosing this scrumptious cake. Please visit Elyse's blog for the recipe. Also, be sure to check out the cakes that the other SMS bakers made this week. 

Saturday, April 11, 2009

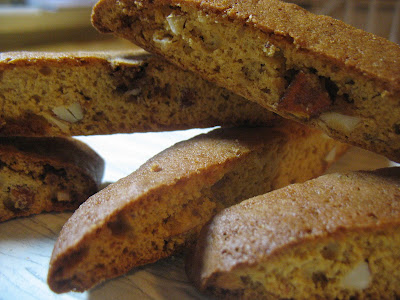
Sweet Melissa Sundays: Honey Beescotti


Here is my first posting for the baking group Sweet Melissa Sundays! I know, I know - this is the recipe from last week, but better late than never! 

The recipe is called Honey Beescotti, and includes 3 tablespoons of honey in the dough, though I replaced it with molasses. I was raised in a unique community where a large percentage of people followed Ayurveda - the ancient system of health from India. According to Ayurveda, honey should not be heated, and has ill effects on health if consumed after heating. This was my first time making biscotti, and it worked great with the molasses, though made it a little darker than everyone else's. Biscotti is not something that I ever would have made had it not been for this group, so thank you to Lorelei of Mermaid Sweets for starting the group and picking this wonderful recipe! Easy and fun to make and so delicious!


I didn't have any problems with the dough spreading, and my logs came out of the oven a lovely dark golden brown. I put candied orange peel in one of the two logs, though I wish I had put it in both - it really added a lot of personality to the biscotti. The recipe called for caraway seeds, though I left those out entirely - partly because I didn't have any and forgot to buy any, and partially because I had an unfortunate experience with an over seeded Irish soda bread scone...

I've never been much of a biscotti person, but these are really delicious and I am enjoying eating them immensely. You can find the recipe on Lorelei's blog, and check out the other SMS bakers to see their versions of this biscotti.


Friday, April 10, 2009

Candied Orange Peel


This was the first time I had ever made a candied citrus peel. It was fairly simple and quite fun. I made two batches - one with brown sugar and one with white. I made these to go in the Honey Beescotti - the first recipe that the Sweet Melissa Sundays bakers are doing. It was supposed to be posted last Sunday, but I didn't have my cookbook yet, so I'm a little tardy with this recipe... Anyway, it calls for candied orange peel. Many of the bakers made their own, so I decided to do the same. I made the brown sugar batch because I was anxious to try it out, and realized too late that I was out of white sugar. However, it came out with a beautiful amber color that I think will add a lot to the look of the biscotti. I'll post that tomorrow. Many of the bakers felt that the process of preparing the orange peels to be candied was quite time consuming and messy, so I came up with a technique that was easy and tidy. 


Candied Orange Peel
adapted from a recipe by Giada De Laurentiis

1 navel orange
3/4 cup sugar
1/2 cup water

Wash orange thoroughly and dry with towel. Slice a small disc of peel off of each end of the orange - about 3/4 inch in diameter. With a small, sharp knife, score the orange from end to end, leaving about 3/4 an inch between cuts. Don't go too deep, or you will cut into the meat of the orange, and the process won't be quite so easy... Once you have gone all the way around the orange, slide your finger under each slice to remove it from the orange. After all slices are removed, your orange should be intact. Don't worry if there is a lot of pith, the recipe takes steps to temper its bitterness. Cut slices lengthwise so that they are about 1/4 inch wide. In a small saucepan, place about 1 1/2 cups of water, and bring to a boil. Add orange slices. Cook for 1 minute. Drain and rinse with cold water. Repeat with fresh water. This blanching removes the bitterness from the pith. Once the process has been completed twice, place the 3/4 cup of water and the sugar in the saucepan. Stir until sugar is dissolved and bring to a boil. Add orange slices, reduce heat to a simmer and cook for about 20 minutes. 


Turn heat to low, remove orange pieces from syrup with tongs, let excess syrup drip off, and place on parchment paper to cool. When cool, lightly toss in sugar and place back on parchment. Leave uncovered to dry for 2 days. I found that the sugar syrup formed a very hard coating when the pieces were immediately removed, but after being coated in sugar and sitting for many hours, they become wonderfully chewy.


Thursday, April 9, 2009

Amaretti Cookies


If you like marzipan, you'll love these cookies. I love marzipan. As a kid - when I inexplicably hated chocolate - my favorite treats were marzipan and maple sugar candy. 

I've never had amaretti cookies - or even heard of them, honestly - but they taste exactly as I anticipated they would after reading the ingredients. They taste like baked marzipan. They're crunchy on the outside, chewy on the inside, and oh so almondy. One bite, and I was transported to my 12 year old self - perm, braces, enormous glasses and all... 

I made these because they are an ingredient in this week's Tuesdays with Dorie recipe. There are some stores that sell them, and you can find them online which I know many of the other bakers did, but we are pretty strict about eating only organic food, and there were no organic versions that I could find. They were just about the easiest cookie I've ever made, and they are delicious. I will definitely be making these again. I say that about everything, don't I...


Amaretti Cookies
adapted from recipe by Garrett McCord for simplyrecipes.com

2 1/2 cups finely ground blanched almonds
1 1/4 cup sugar
3 egg whites
1/2 teaspoon vanilla extract
1 teaspoon almond extract


Preheat oven to 300. Line baking sheet with parchment paper. In bowl of stand mixer, stir together sugar and ground almonds until well combined. Add vanilla and almond extracts. Add eggs 1 at a time, and mix on medium until dough forms. Make flat-ish circles on parchment paper, about 1 1/2 inches in diameter. These cookies do not spread, so they can be somewhat crammed in. Bake for about 30 minutes, or until cookies are golden brown. If you want them extra chewy, reduce baking time by 3-5 minutes - cookies will be lightly browned around the edges. Transfer cookies (on parchment) to cooking rack, and allow to cool for about 15 minutes before removing them from the paper. Try not to eat all of them in one sitting!


Wednesday, April 8, 2009

Chocolate Chocolate Chunk Bread


To make up for my absence over the past week - we took a trip to NYC to see Paul McCartney, Ringo Starr and others perform at Radio City Music Hall - I give you chocolate bread. Oh yes, chocolate bread. I am insane for chocolate, and any excuse I can find to eat it with more frequency, I'll take! The first time I ever had chocolate bread was in NYC at a restaurant called Balthazar. When I lived in NY after college, my friends and I used to go to there for breakfast. Balthazar is a rather pricey joint, and the only thing we could afford on the menu was a basket of assorted breads, but it was enough. The basket contained fruit focaccia - something I'm hoping to attempt in the coming weeks, brioche, a sticky bun, and chocolate bread. While in NY this past weekend I took my husband there, and was inspired to make some of the heavenly food when I got home. I believe Balthazar's is a yeasted bread, but I did a quick bread version. It is delicious, and I will be making it often. Very often. Here is the recipe.

Chocolate Chocolate Chip (though I used chunks) Bread 
adapted from the Bread Bible by Rose Levy Beranbum


4 tablespoons unsweetened cocoa powder
3 tablespoons boiling water
1/2 teaspoon vanilla extract
3 large eggs
1 1/4 cups sifted cake flour *or* 1 1/4 cups minus 2 1/2 tablespoons sifted unbleached white flour plus 1 1/8 tablespoon cornstarch
3/4 cup plus 2 tablespoons sugar
3/4 teaspoon baking powder
1/4 teaspoon salt
13 tablespoons softened unsalted butter
1/2 cup semisweet chocolate chunks


Preheat oven to 350. Butter loaf pan, line bottom of pan with parchment, butter parchment, and lightly flour entire pan. Whisk cocoa powder and boiling water until smooth. Let cool. Whisk in eggs and vanilla. Set aside. In mixer bowl, combine flour, sugar, baking powder, salt and cornstarch if not using cake flour. Mix until combined on low speed. Add 1/2 chocolate mixture and all of the butter. Mix until dry ingredients are moist, then turn up to medium speed for 1 minute. Scrape down sides of bowl. Add 1/2 of remaining chocolate mixture, beat 20 seconds. Repeat with last of the chocolate. Scrape down sides of bowl. Fold in chunks of chocolate. Pour batter into prepared loaf pan and place on middle rack of oven. Bake for 65-75 minutes, or until tester comes out clean. Let cool in pan for about 15 minutes. Remove from pan and cool completely on rack before slicing. Yummy...


Related Posts with Thumbnails

ShareThis